A lot of clients of ours run Facebooks and are mainly looking to see the results of
-Ticket Page views
-Add to Carts’
-Add Payment Info’
-Purchases
So today we are going to show you how to setup these Events within your Facebook ads account and how to make it so they display on your ad results.
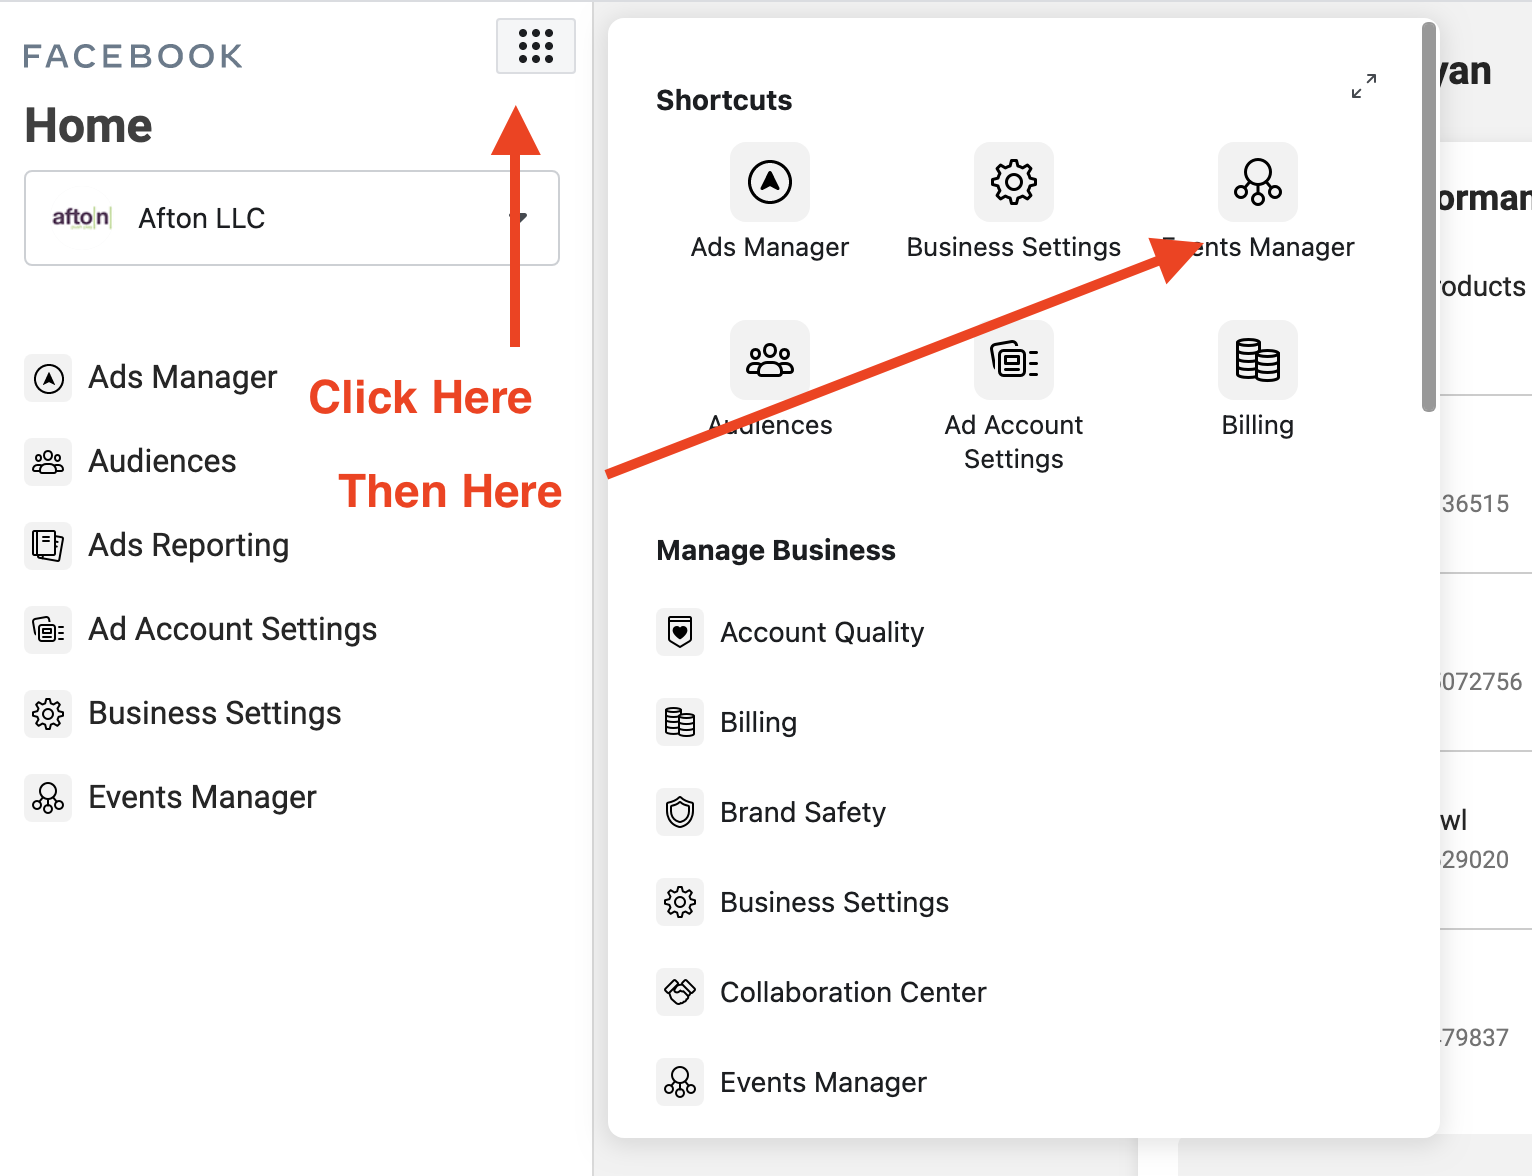
- You will need to head to business.facebook.com to and login to your account
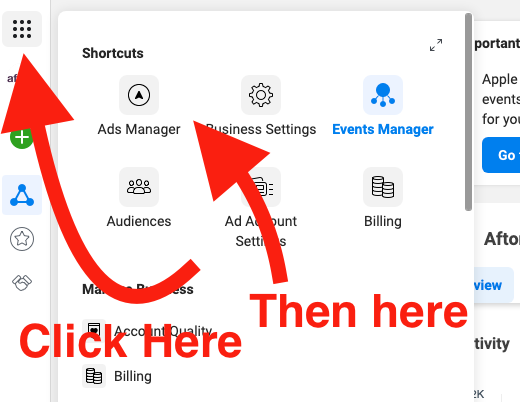
- Then you will need to click on the 9 dots in the top left corner and click on ‘Events Manager‘
- From there just make sure that you have the correct Pixel (that you are using for your ad) selected.
![]()
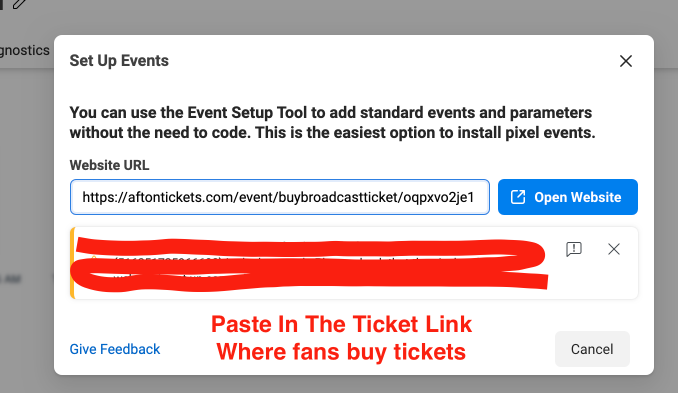
- Then click on ‘Add Events’ and then click on ‘From the Pixel’

- Then you will need to paste in your link to where fans buy tickets from and click ‘Open Website’.
- Now, from the top of the page click on ‘Track New Button’. (You are essentially telling Facebook what each event means right now).
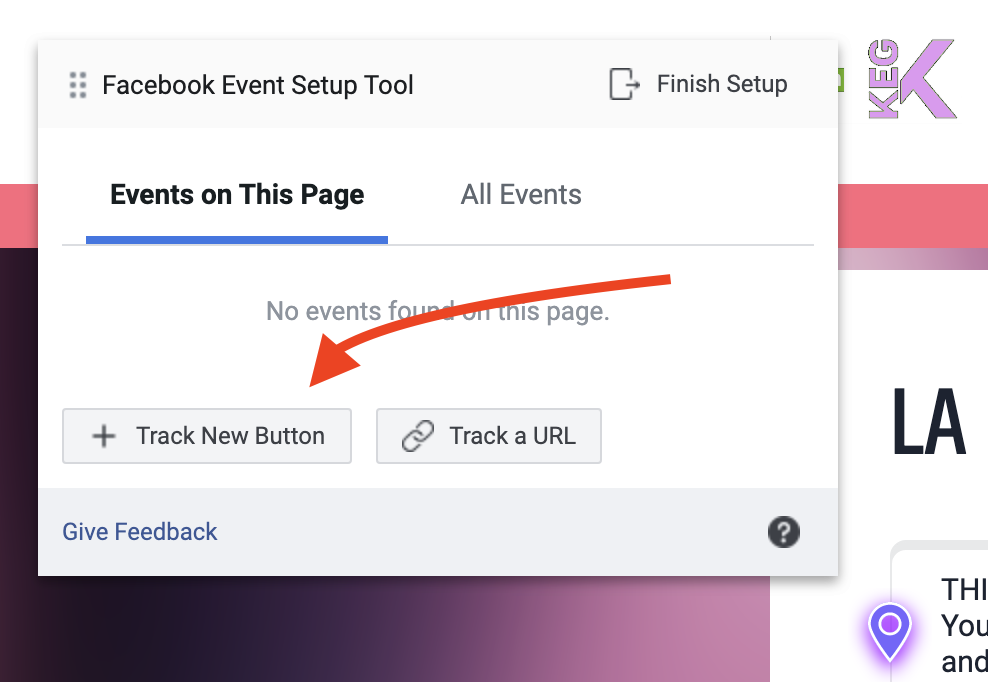
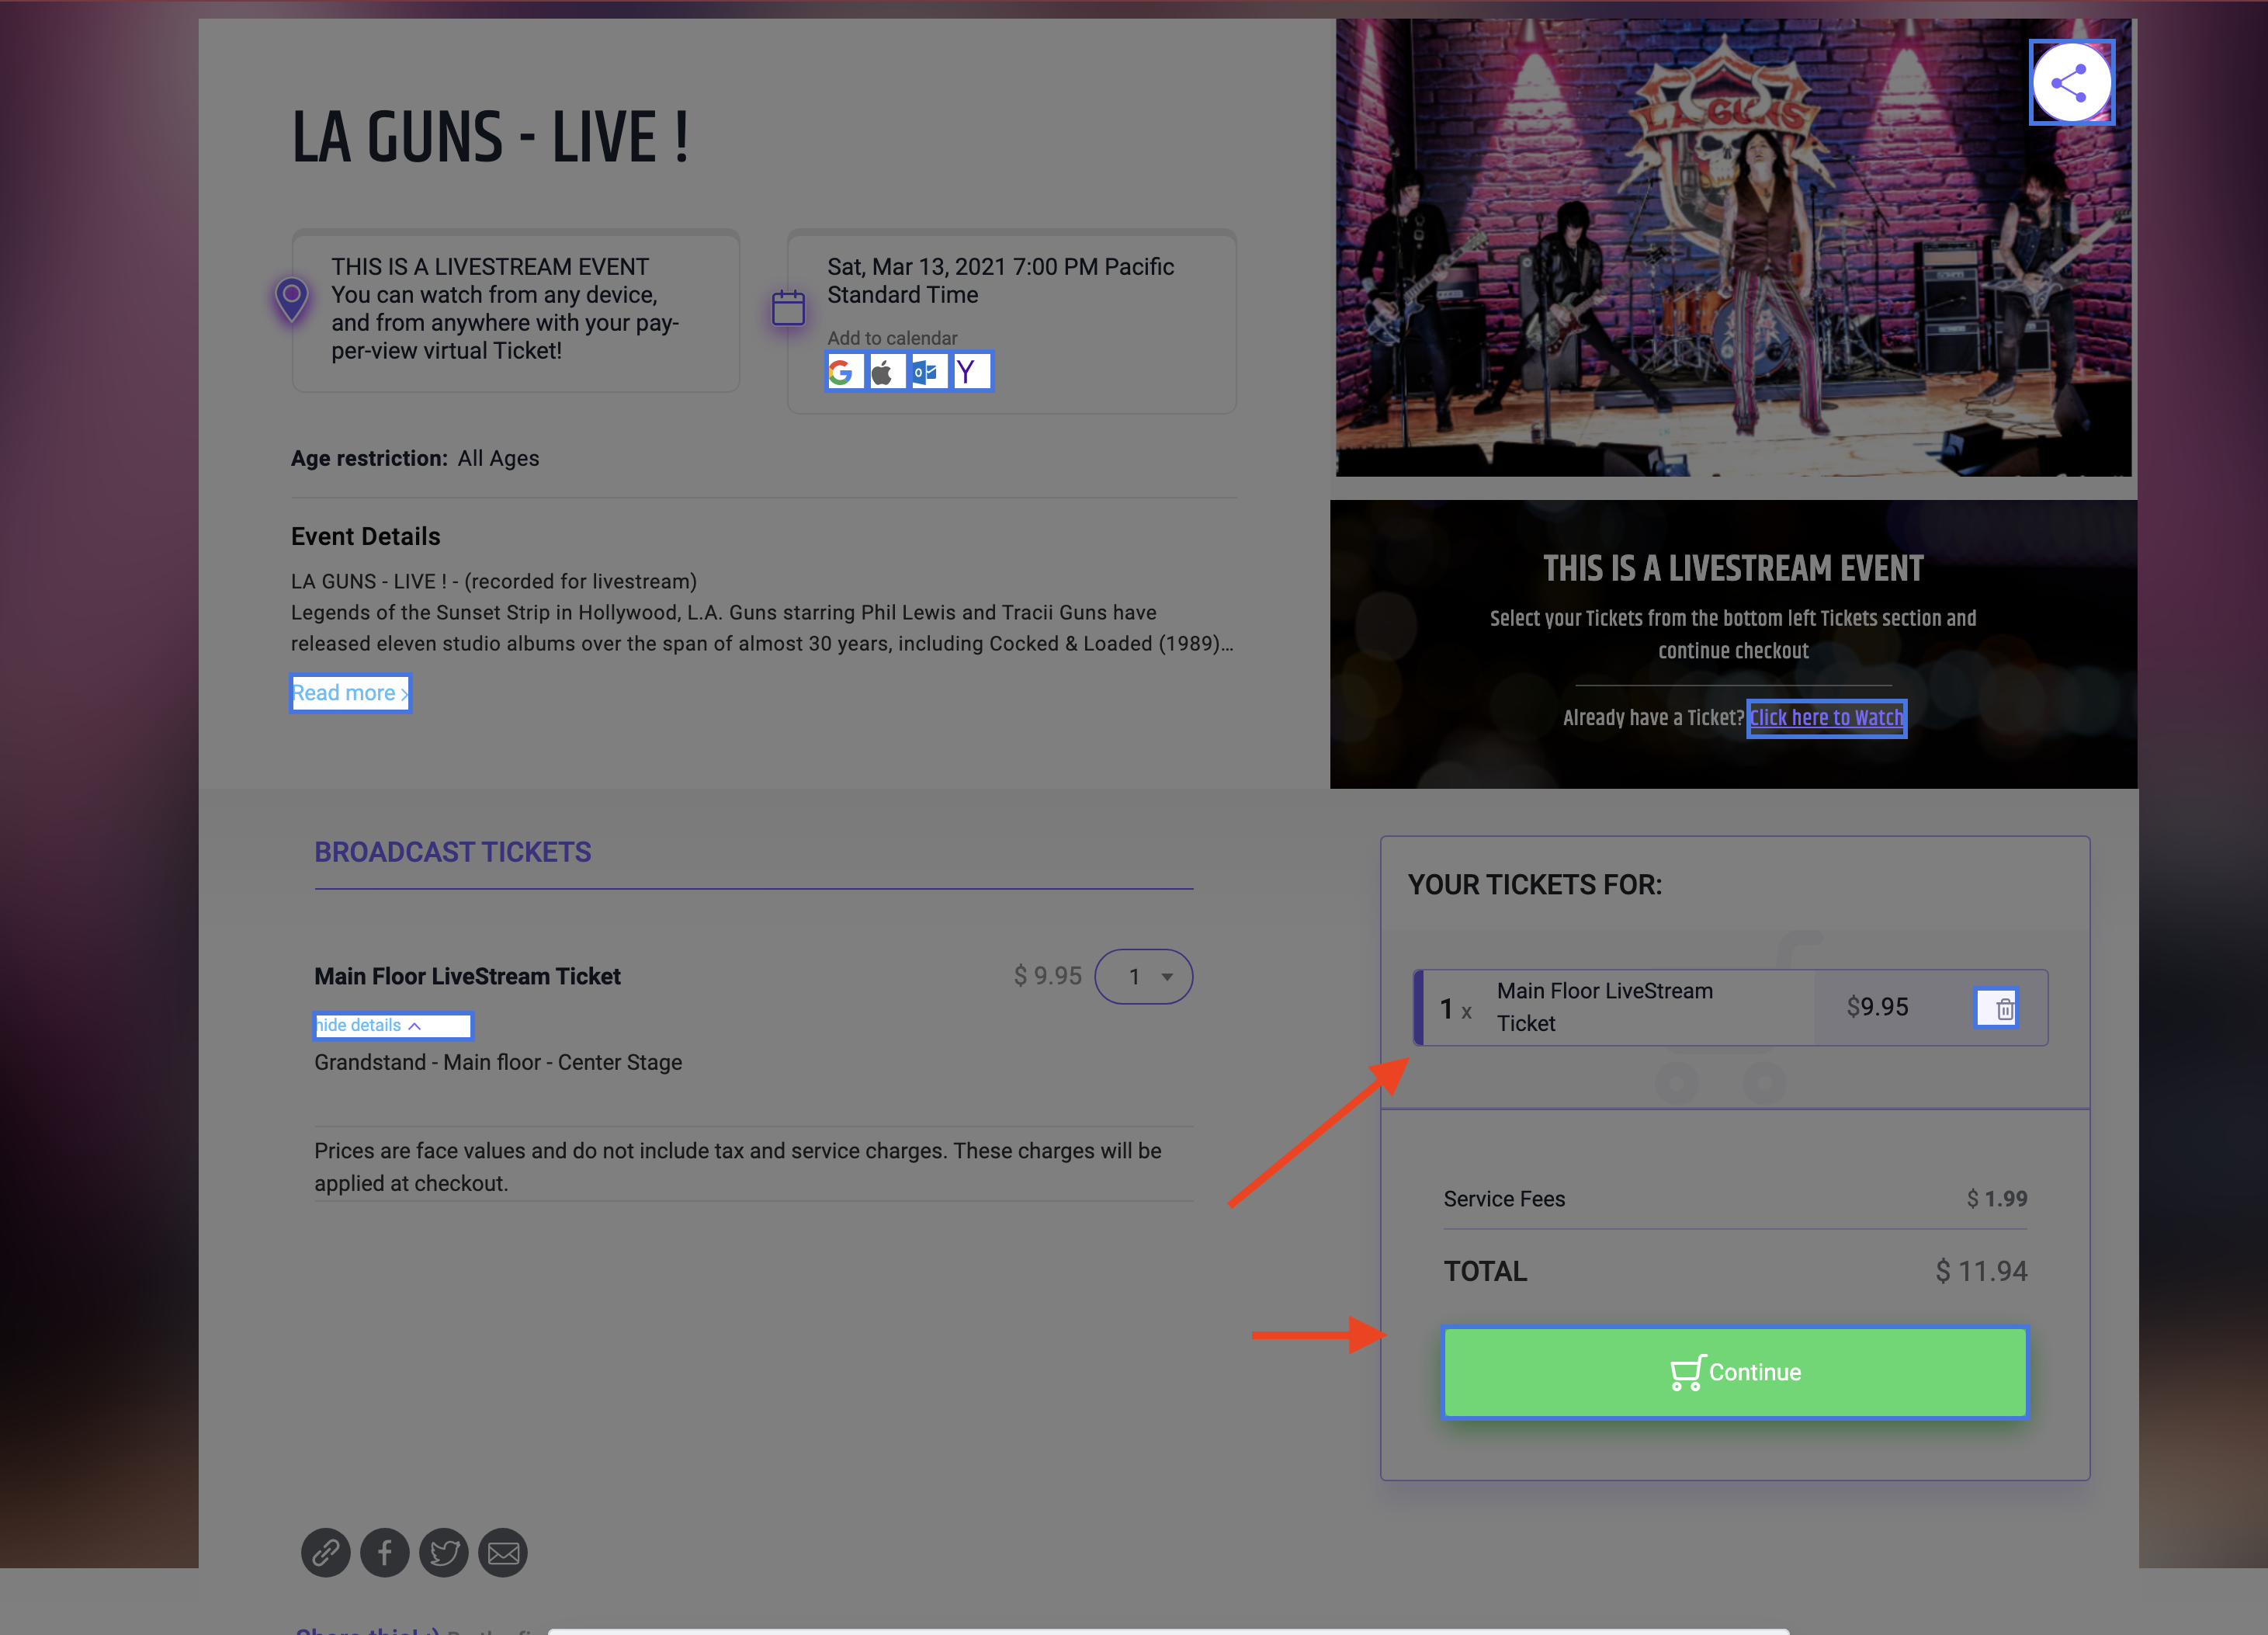
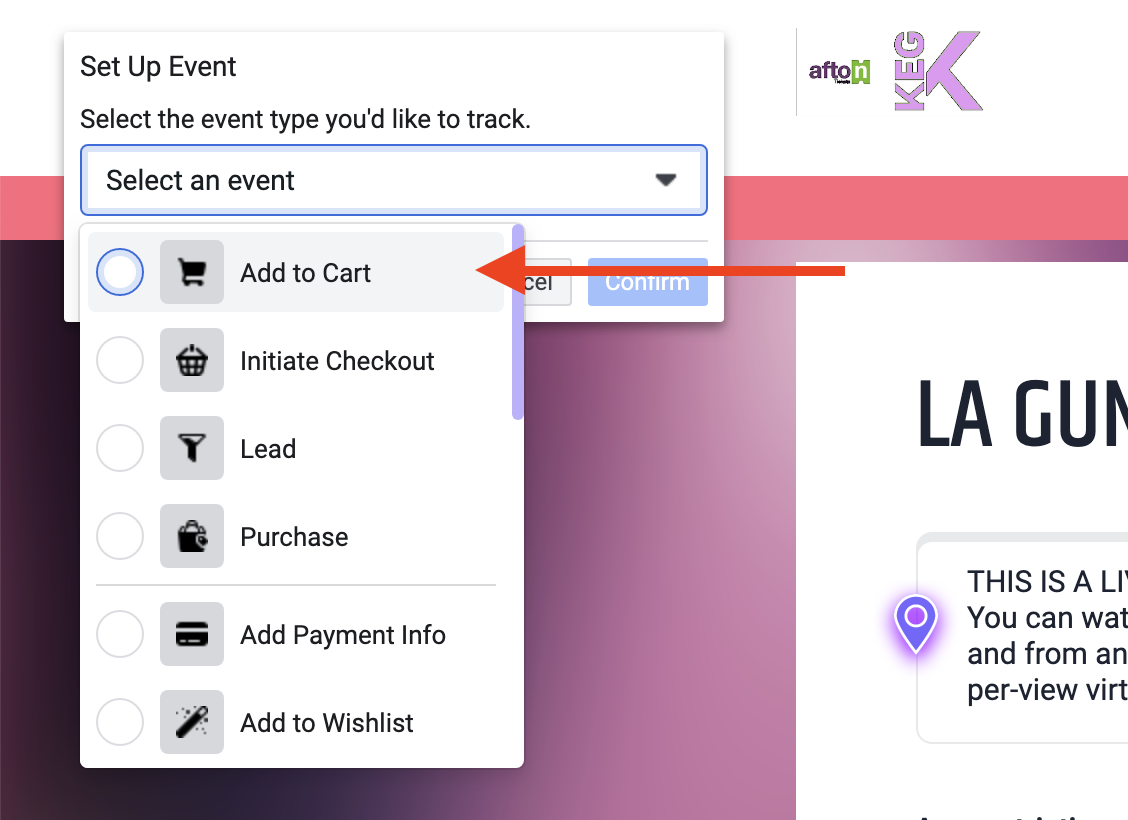
- Now you go through step one of purchasing a ticket. So you select how many tickets you want to buy (I just used 1 for this example). And the clicked on ‘Continue’ button which is essentially the ‘Add to Cart’ Button equivalent for our website.
- Now you are just telling Facebook what button you just clicked. Again, in this case that is the ‘Add to Cart’ button. So once you select that Facebook will know when you are running an add and someone selects a ticket then clicks that button, to let you know that the ‘Add To Cart’ button was triggered, so it will display that to you.
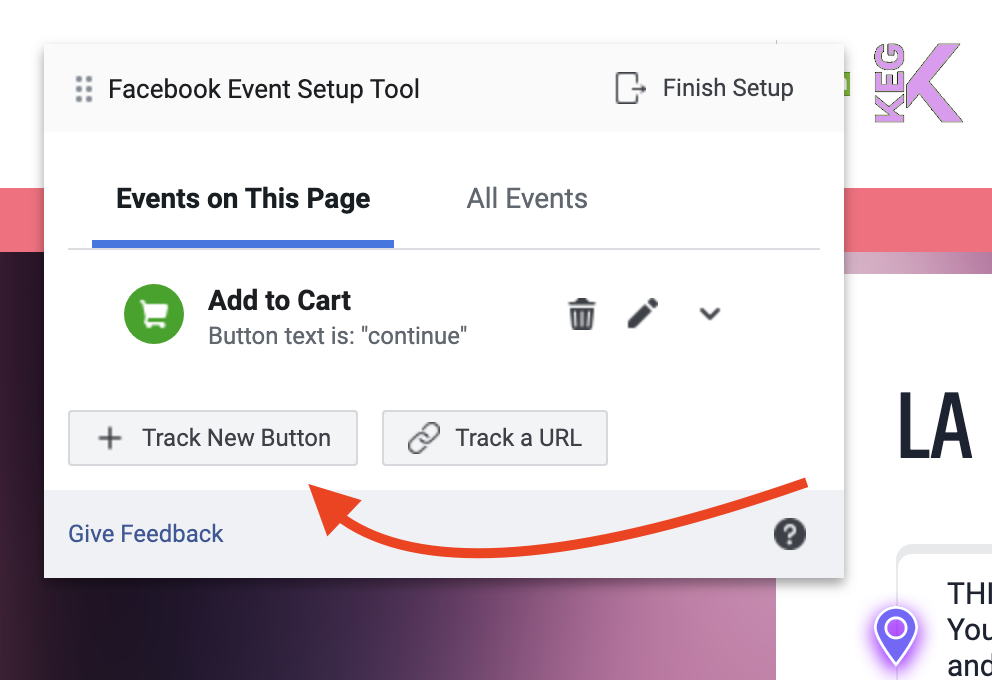
- As you can see in the image below you have successfully added the ‘Add to Cart’ Button to your events. Now you can either click ‘Finish Setup’ to save that. Or you can continue through the process and create buttons for ‘Add Payment info, initiate checkout and Purchase. Which are the most common buttons that our clients add.
- Once you are down with that just go ahead and click on the 9 buttons like you did before, but this time click on ‘Ads Manager Next’.
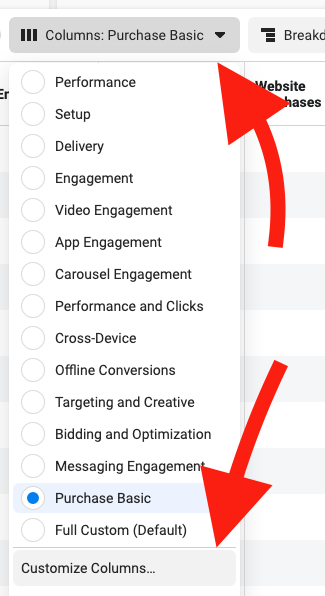
- Then you will need to click on ‘Columns’ and then at the bottom of that pop up window click on ‘Customize Columns’. This section is where you can customize the look of your ad results so that it only displays the information that you would like to be shown. This has helped a lot of clients from being overwhelmed with the amount of information because lets face it Facebook provides a lot of information and for many it is information that they do not need.
- On the screen you just need to scroll down the page and make sure that all of these sections are checked in the box on the left side.
- Amount Spent
- Link Clicks
- Adds of Payment Info
- Adds To Cart
- Landing Page Views
- Purchases
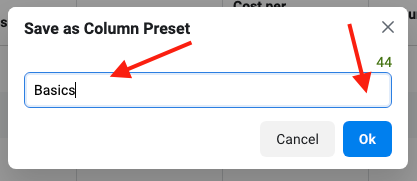
- Once you have all of those selected, just click the ‘Apply’ button. (NOTE: Before looking at the results make sure that you go back and click on ‘Columns’ as you did before, only this time click the blue save button. This was keep you from having to select these each time you come to the page.)
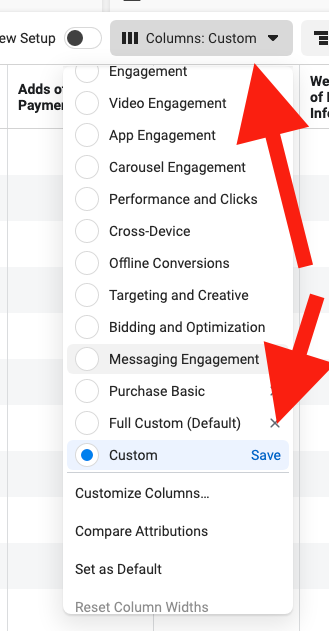
- It will then ask you to name your preset and then click on okay.
- Now each time you come back to ‘Ads Manager’ to view your results you will be able to see these listed here.
They should look something like this:


If any questions come up during the process please do not hesitate to reach out to us for help!