How to Add a Pre-Recorded Video to Livestream
Video Walkthrough:
Written Walkthrough:
Start off by opening up your OBS program (if you do not already have OBS installed you can head to this help article for full info on that.
(NOTE: If you don’t want a thumbnail image for your performance you can skip down to VIDEO SETUP.) Most poeple will want a Thumbnail image because when you are streaming something to fans no matter what program is used there is always a small delay between you and the customers/fans watching. So when you first go live it is good to have a static image or a teaser video to play so that the fans do not miss part of the actual performance that you have for them.
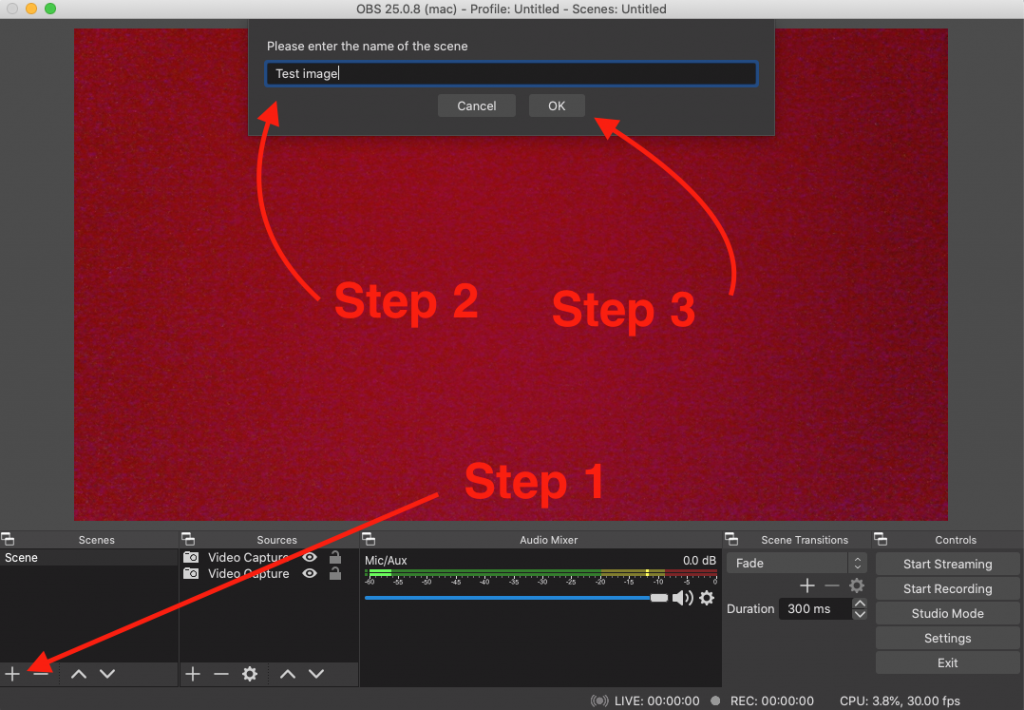
You will need to click on the ‘+‘ button on the bottom left under ‘Scenes’. It will then give you the option to name your image. Once you do that you just need to hit Ok.
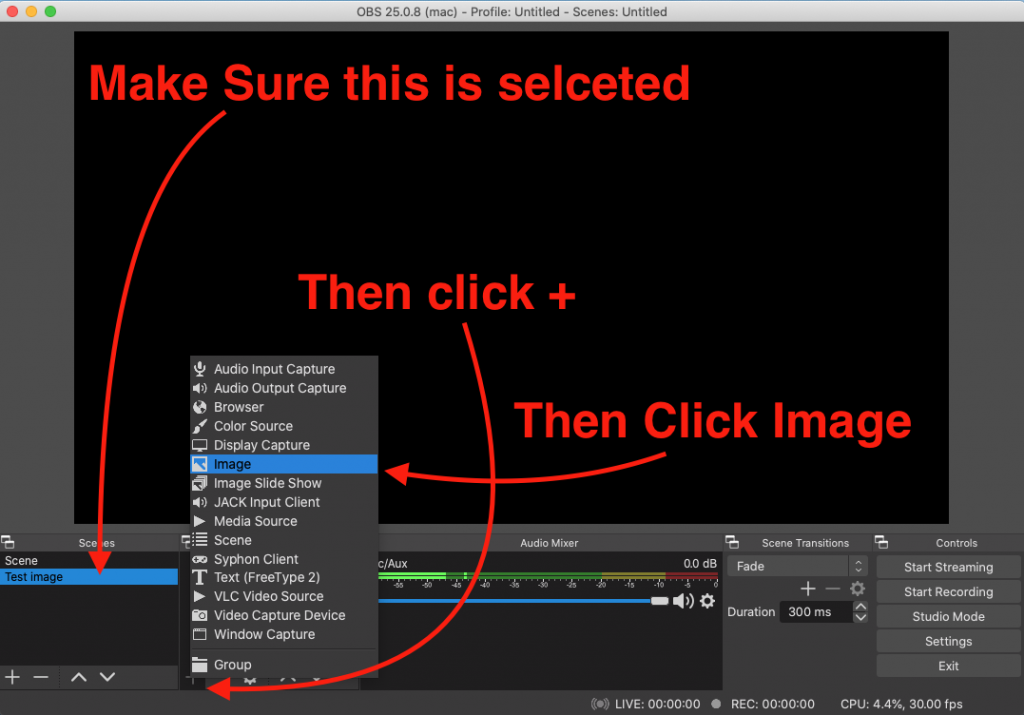
Then you will need to make sure that image is selected and then hit the ‘+‘ button in the ‘Sources’ box to the right of that and click on ‘Image’.
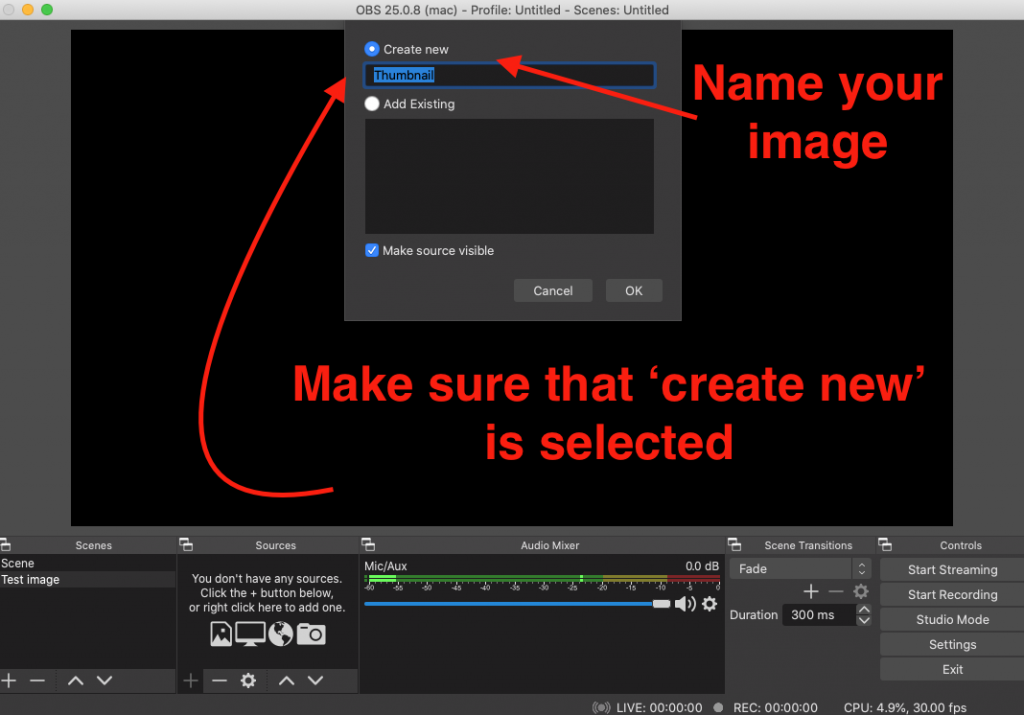
Then you will need to make sure that ‘Create New‘ is selected and that your image is named. Then click ‘Ok‘.
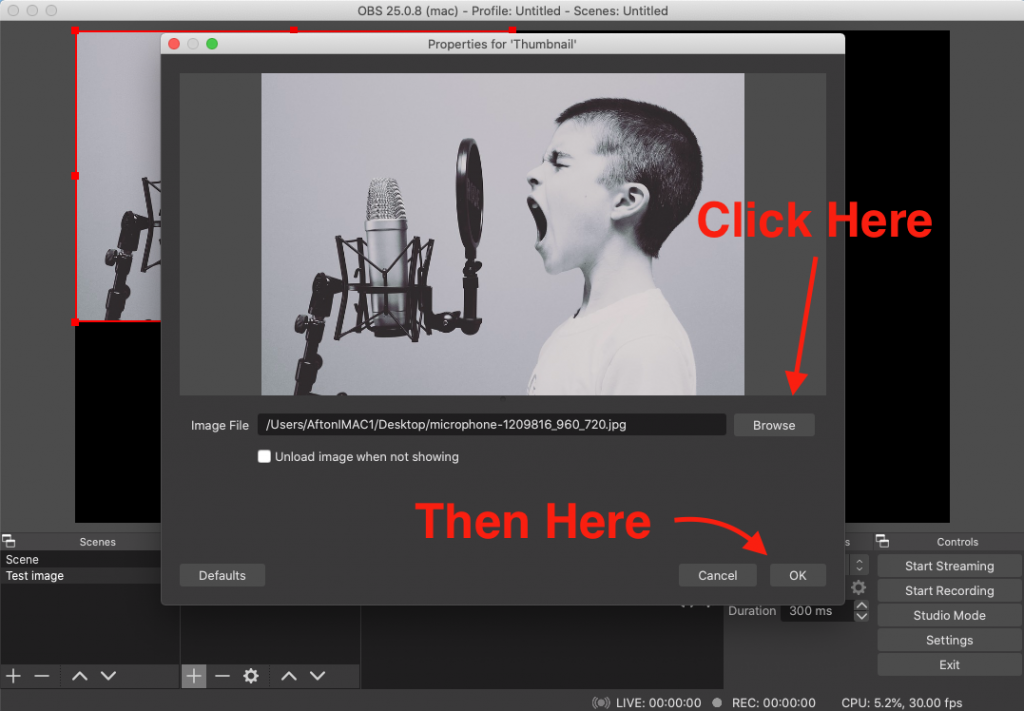
Next you will need to click on ‘Browse‘ to find the image that you would like to use and then click ‘Ok‘.
Video Setup
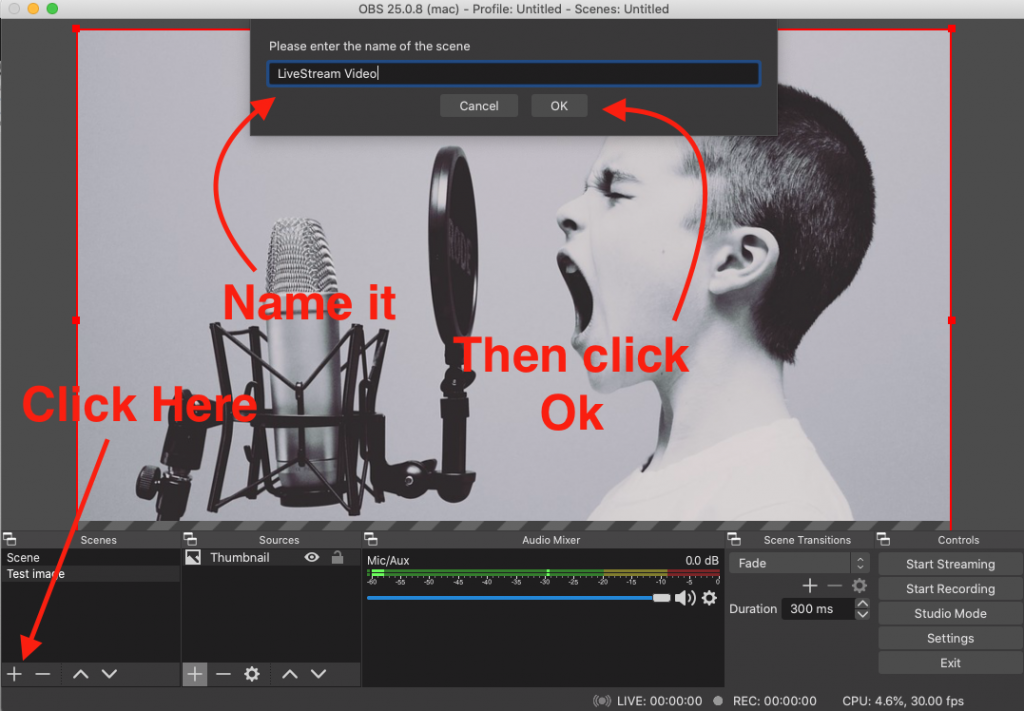
Starting off you will just click on the ‘+‘ button in the bottom left corner under ‘Scenes‘. Then you will need to name the file and hit ‘Okay‘.
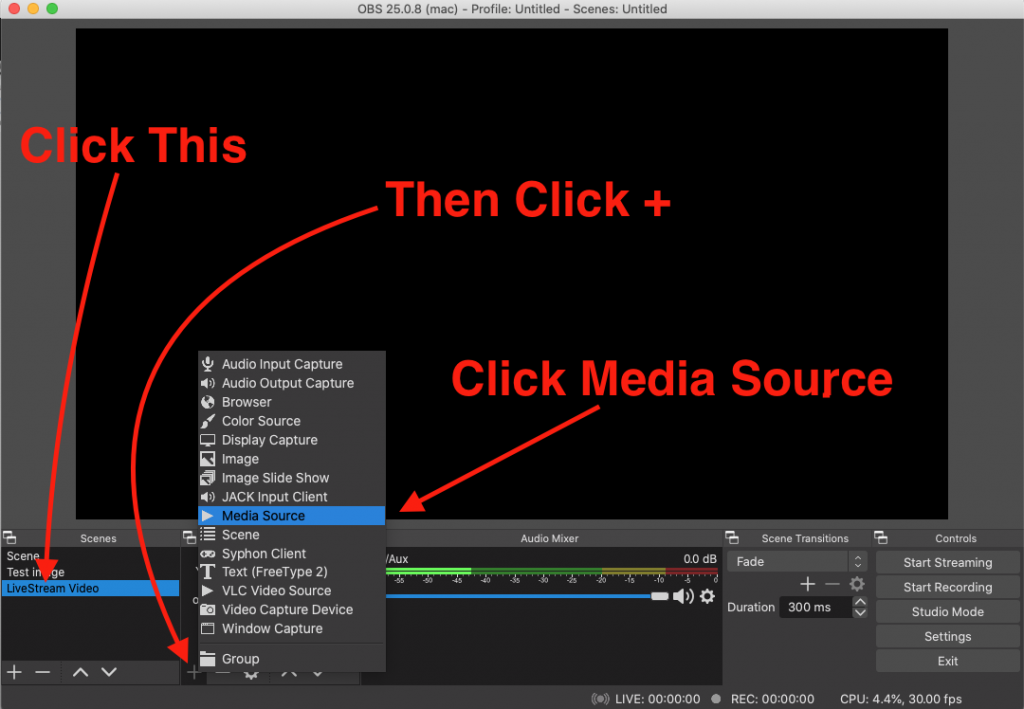
Next you will need to make sure that you have your ‘Scene‘ selected (in this case mine is called ‘LiveStream Video’. Then hit on the ‘+‘ button in the ‘Sources section‘. Then click on ‘Media Source‘.
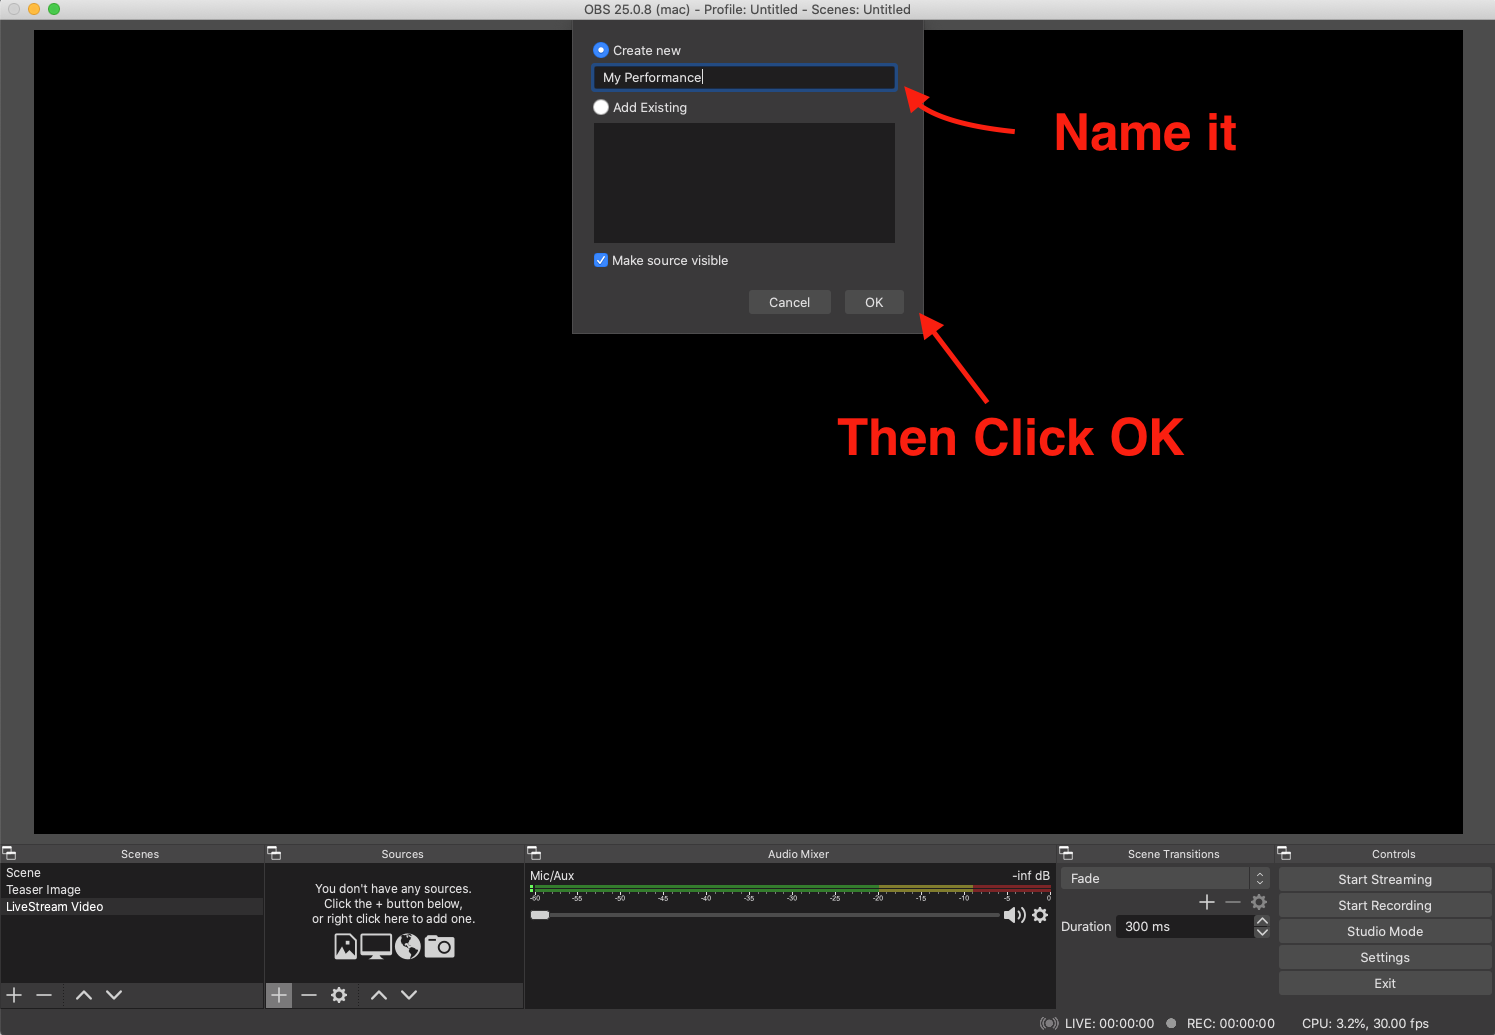
Then you just need to name the file and click ‘Ok‘.
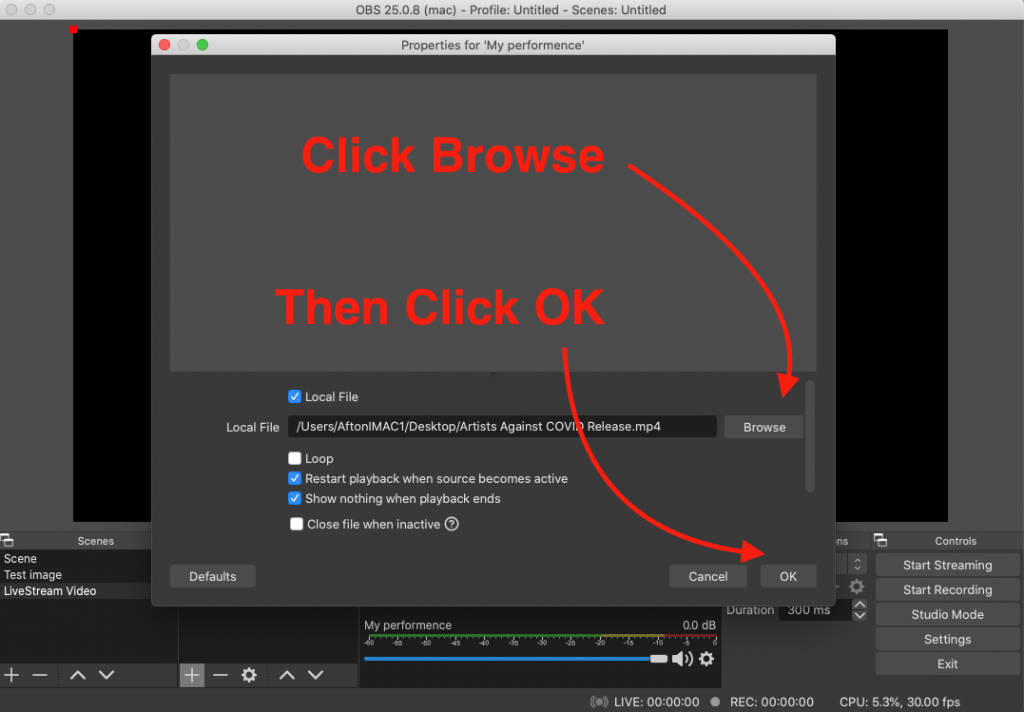
Next you will need click on ‘Browse‘ and locate the pre recorded video that you want to be played on your LiveStream. ( **SPECIAL NOTE** Make sure to unselect the ‘Restart playback when source becomes active‘ if you do NOT want your video to start over when clicking on another ‘Scene‘. The video will stay play perfectly fine if you keep that setting checked, but just be aware that if it is checked once you click on your file you cannot click on a different ‘Scene‘ or else the video will replay from the start. ) Once you have finished on this page just hit ‘Ok‘.
Once everything is setup for the show just make sure that you have the ‘Test Image‘ selected when you go live so that fans see that and then once you are on and no you are live then you can click on ‘LiveStream Video‘ (or whatever you named your file) in order for the video to begin playing.

And please remember that we have a ton of other walkthrough videos that can help you in the streaming process. We have listed a couple of them below.