First, make sure this is the right article. You only need to follow these steps if the following is true:
- The device you’re going to LiveStream on is a PC computer or PC laptop. (Do not do this if you are using a MAC computer).
- You plan to use a DAW recording software (such as Pro Tools, Ableton, Reaper, etc. (You don’t need to do this if you aren’t going to use a DAW).
- You already successfully downloaded and installed the ReaStream Vst Plug-in as previously instructed in your Tech Rider.
- If you have not done this step yet, stop and Click Here to complete that step.
OK, Here We Go!
Two things must be completed in order for your DAW Master Bus (Master Output Channel) to connect to OBS correctly, as follows:
PART 1:
Add ReaStream Vst Plug-in to the Fx on the Master Bus of your DAW.
PART 2:
Setup OBS Studio to receive the Mast Bus output from your DAW.
PART 1: Add ReaStream Vst Plug-in to the Fx on the Master Bus of Your DAW
This next step ensures that the correct ReaStream Vst plug-in is inserted properly into the Fx of your DAW’s Mast Bus (aka Master Output Channel).
If you forget to do this, or do this improperly, the Master Audio Output from your DAW won’t be received in OBS Studio and you and your fans won’t be able to hear what is being played in your DAW for backtracks, beats, etc.
- Open your DAW software (Reaper, Pro Tools, Ableton, etc).
- Open the exact project you’re going to use in your DAW for your LiveStream. You can use an existing project or create a new one.
- Insert the correct plug-in:
- In your DAW, click on the “Fx” on the Master Bus (also known as Master Output Channel).
- Click “Add” in the FX: Master Track pop-up window.
- Click on the “Cockos” nested beneath the “All Plugins.”
- Double click the CORRECT plug-in, it must be named exactly as below and be the (ReaPlugs Edition) (x86) (Cockos) version. Do not mistakenly insert the wrong plug-in.
- VST: ReaStream (ReaPlugs Edition) (x86) (Cockos)
- The plug-in window will appear, select “Send Audio/MIDI. IP.” radio button.
- Select the “Local Broadcast” from the dropdown.
- Click the “x” in the top right of this plugin window to close it.
IMPORTANT LAST STEP!
To VERIFY you’ve done this correctly, click “Fx” again on the Master Bus and you should see this exact plug-in now appearing in the window.
DOUBLE CHECK: This plug-in you just inserted must be the VERY LAST listed plug-in in the Master Bus (aka Master Output Channel) list, or else it won’t work correctly.
You can drag up or down the plug-ins in that list to ensure this plug-in is listed at the very bottom of all other plug-ins.
Make Sure to Save the DAW Project Correctly
It’s important to understand that by saving this DAW project you just inserted this plug-in into, it will save everything you just did – for this ONE PROJECT ONLY.
So later when you open up this project, these steps are already done.
But if you do more LiveStream performances in the future, remember that you either need to do these steps again – OR what we recommend is making a “LiveStream Project” template with these settings so that on future LiveStreams you are just copying over this existing project with the correct plug-in settings.
Now that your DAW is setup correctly for LiveStream, later on in your Tech Rider at MyAfton.com, we’ll teach you how to setup OBS Studio to receive the master audio output from your DAW.
PART 2: Setting Up OBS Studio to Receive Master Channel Output from Your DAW
In Part 1 above, you setup the correct Vst Plug-in so your DAW now has the ability to send the Master Channel Output to OBS Studio.
Here in Part 2, you need to now setup OBS Studio to be able to receive that Master Channel Output from your DAW.
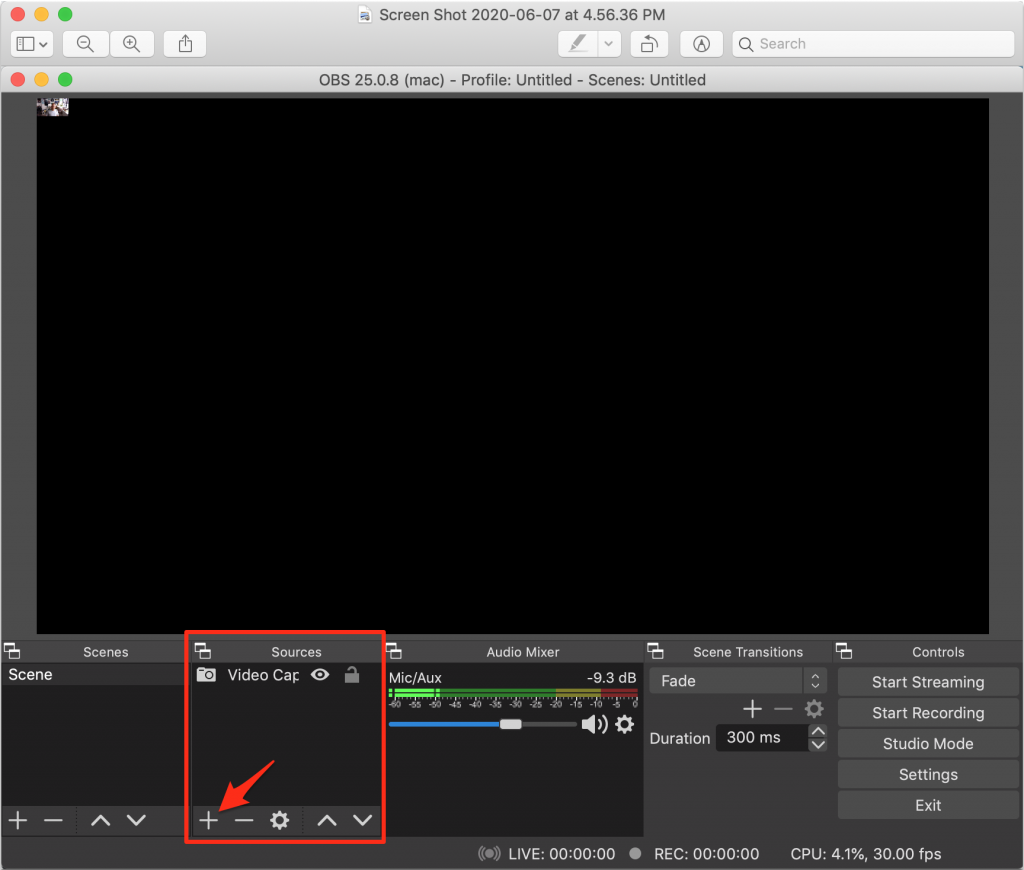
- Open OBS Studio. (at this point you should already have it installed)
- Under the SOURCES Box, click the “+” button to add a source. Sources is located in the bottom left of the main window in the lower toolbar area.
3. After clicking the “+” in Sources, a menu appears. Select “Audio Input Capture” from that menu.
4. A window pops up, select the radio button “Create new,” and in the field below it, rename it to be called “DAW” (instead of the default text that appears in that field Audio Input Capture). Keep the “Make Source Visible” check boxed as checked/on. Then click OK.
5. Now in this window you’ll see Device: with a drop down. Choose “Default” and click OK. Now you’ll see the newly named “DAW” in the SOURCES section on OBS.
6. Now click the GEAR ICON for the “DAW” Audio Mixer to the right of it’s volume control. Make sure to click the gear icon for the “DAW” not for the Mic/Aux.

7. Once you click the correct Gear Icon for the DAW in Audio Mixer section, a drop down appears. Select “Filters” from that drop down.
8. In Audio Filters pop up, click the “+” button in bottom left corner to add a Filter.
9. In the drop down choose “VST 2.x Plug-in”
10. Now in the drop down menu, choose the right plugin: reastream
If it’s not appearing, it means you installed it incorrectly to the wrong destination folder.
Don’t close this pop up, we’re now going to do a test.
How to Do a Test to Ensure Proper Connection
If you completed Part 1 and Part 2 it should now work. But we want to test it to be sure. To do this test you need to be in the Audio Filters pop up window of OBS Studio.
If you’re not there already, click the gear icon to the right of the DAW audio mixer and choose Filters from the dropdown.
1. Click the “Open in plugin interface” button below the dropdown to open the plugin so we can do a test.
2. Now go back into your DAW software and open the LiveStream project that you already inserted the ReaStream Vst Plug-in for.
3. Arrange your DAW window and OBS Studio window so they are side by side and you can see both. Resize your windows so you can see both.
4. Then click play on your DAW project, and verify the signal is actually passing through to OBS Studio. You know if it’s working if the plugin window that’s open in OBS is showing signal in the volume meters.
5. Adjust the levels so that you’re not peaking in your DAW and you’re not peaking in OBS Studio.
That’s it, if sound is passing through to OBS Studio then you’ve properly set everything up.
How to Sound Check for Your LiveStream Offline with Your DAW
We recommend that you record yourself, 30-60 seconds, from within your DAW. All of the audio will be coming out of your DAW Master Channel Output. So you can create the tracks for any live vocals or live instruments that will be performed live, those will run through your DAW in addition to any backing tracks or beats that are in your DAW project.
Once you record 30-60 seconds of your offline sound check through your DAW you can listen back, mix it, put effects on, etc. You can make it sound exactly how you want it to sound. Remember, whatever it sounds like, is what it will sound like to fans when you LiveStream.
The beauty of this setup is, you can spend as much time as you want mixing and settings up the levels, offline, well before your actual LiveStream gig. This takes the pressure off, you can dial in everything perfectly way ahead of time so that when it’s time to enter the Green Room of your MyAfton.com account 30 minutes prior to your show start time – you won’t have any problems.
If you properly sound check offline, then when you enter your MyAfton Green Room 30 minutes prior to show start time, all you have to do is simply verify your stream connection and connection speeds. Your mix will already be done and sound exactly how you want it to sound.