NOTE: If you missed our help article explaining how to setup your Facebook pixel you will want to check that out first and make sure your pixel is set up so that you can better analyze the results of your ad. You can read that article HERE.
Video WalkThrough:
Help Article:
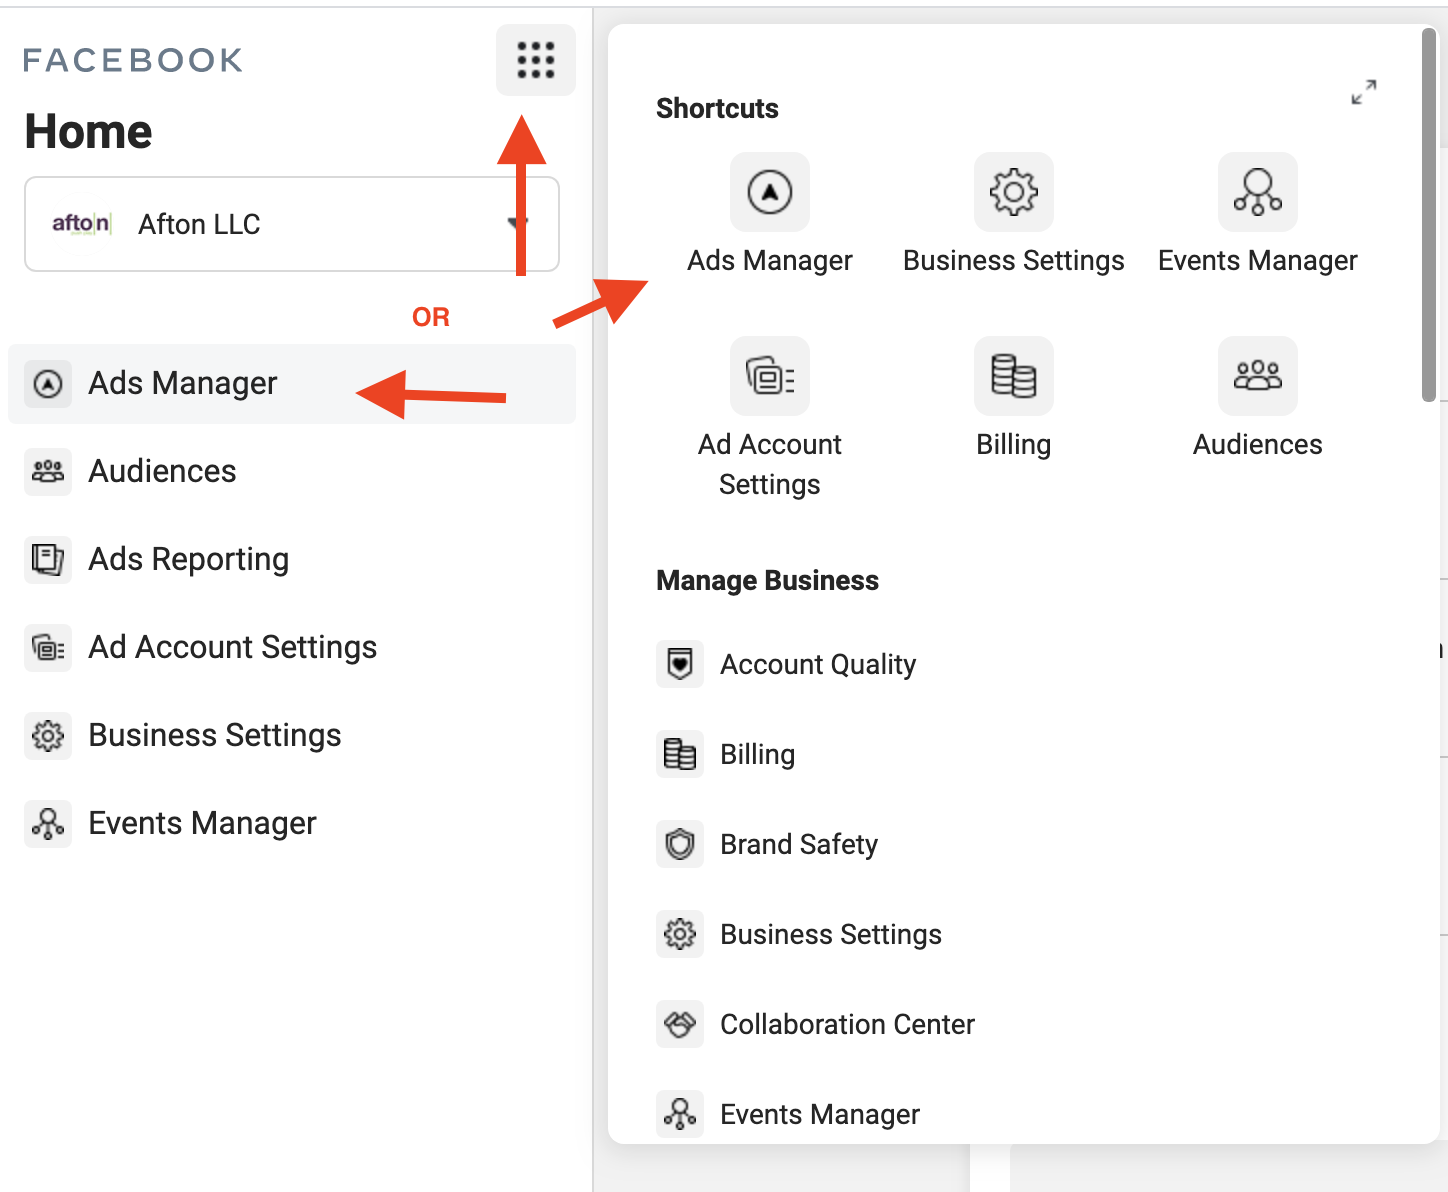
Head to your https://business.facebook.com/ account. Once you are logged in, you will need to head to ‘Ads Manager’. You can access that either by clicking the button on the left tool bar or by clicking the 9 dots button and finding it there.
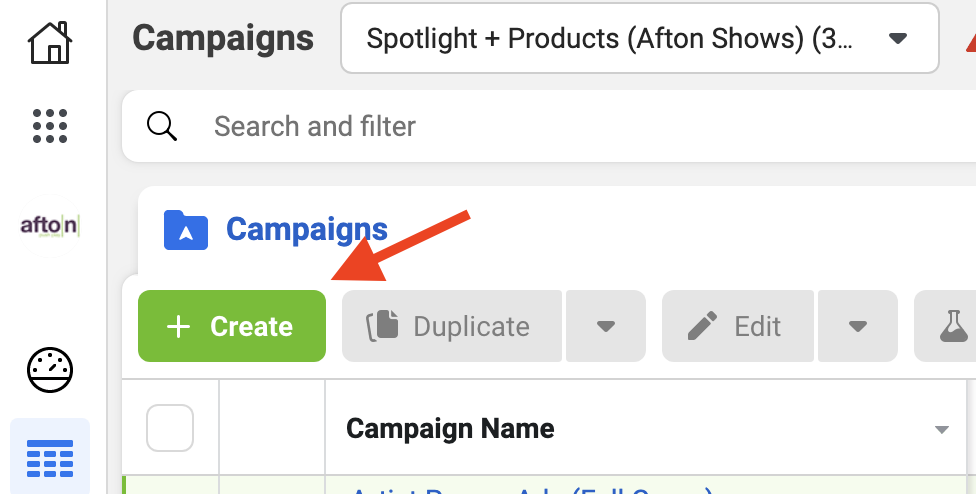
Once you are on the’Ads Manager’ page you will need to click on the green ‘Create‘ button.
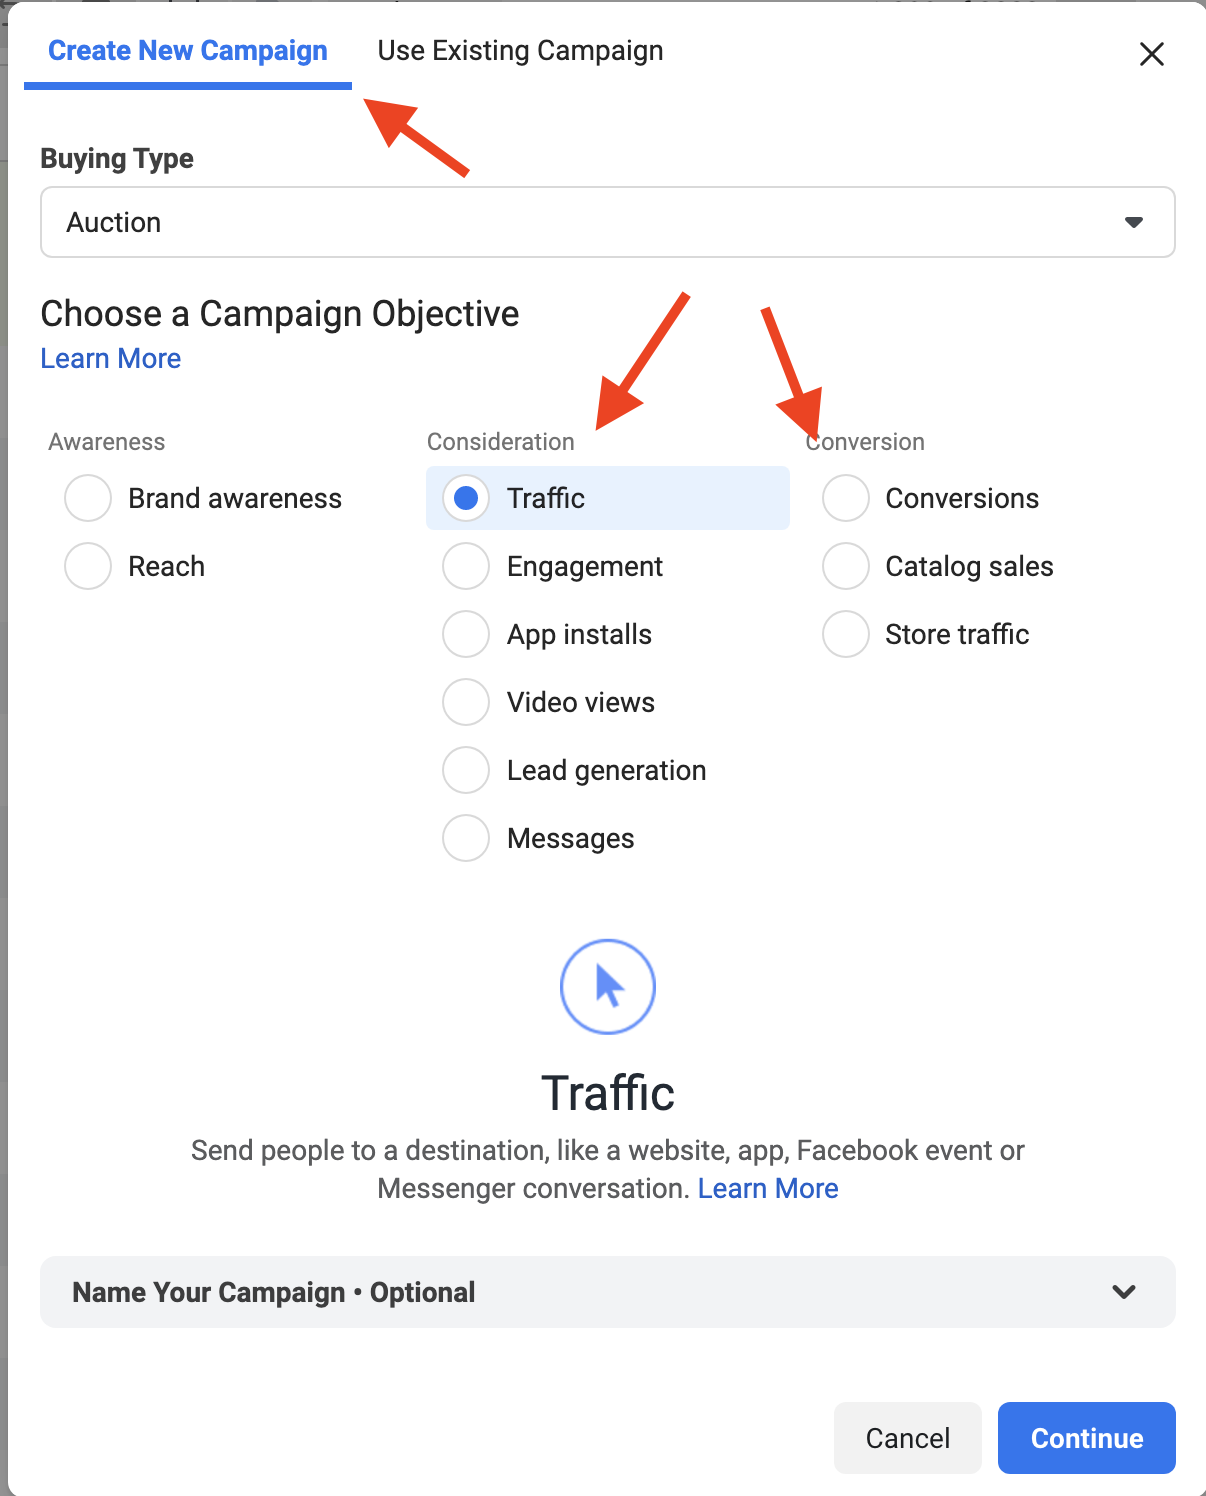
On the next window, you will need to click on ‘Create New Campaign‘ and then select the campaign objective. The two that we recommend are either ‘Traffic‘ or ‘Conversations‘. This article will use the ‘Traffic‘ objective. So just select that one and click on continue.
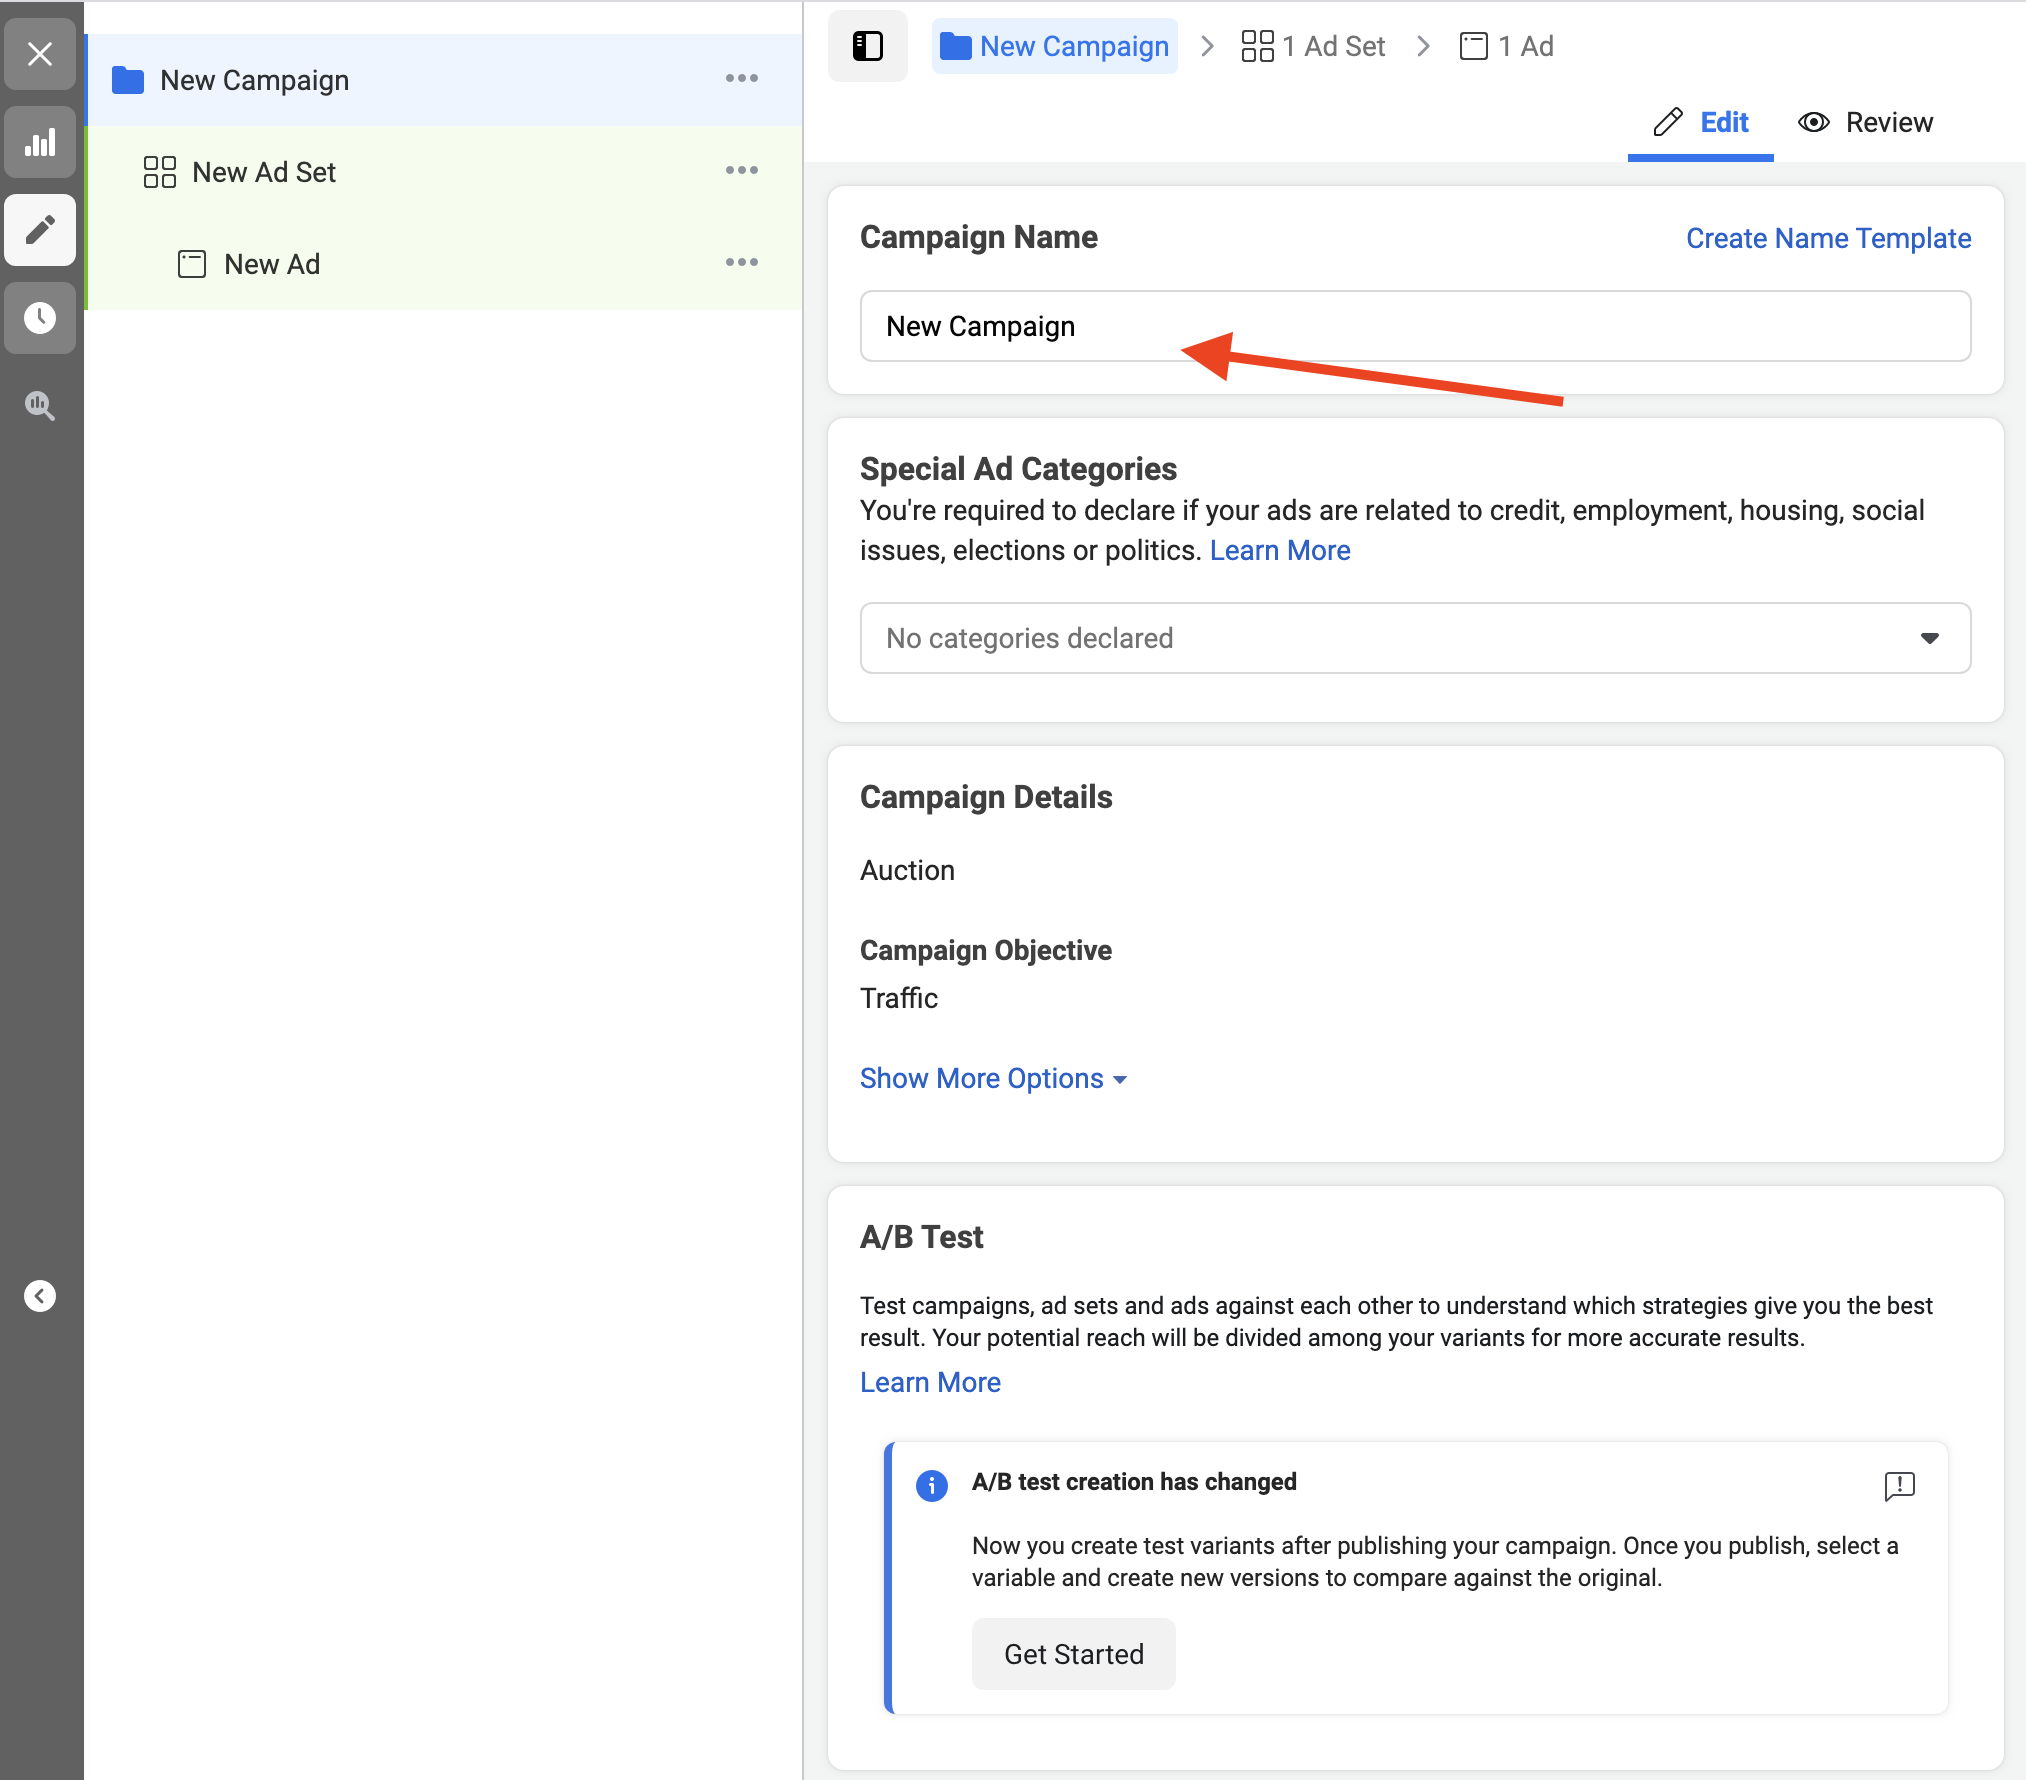
On the next screen you will need to name your campaign.
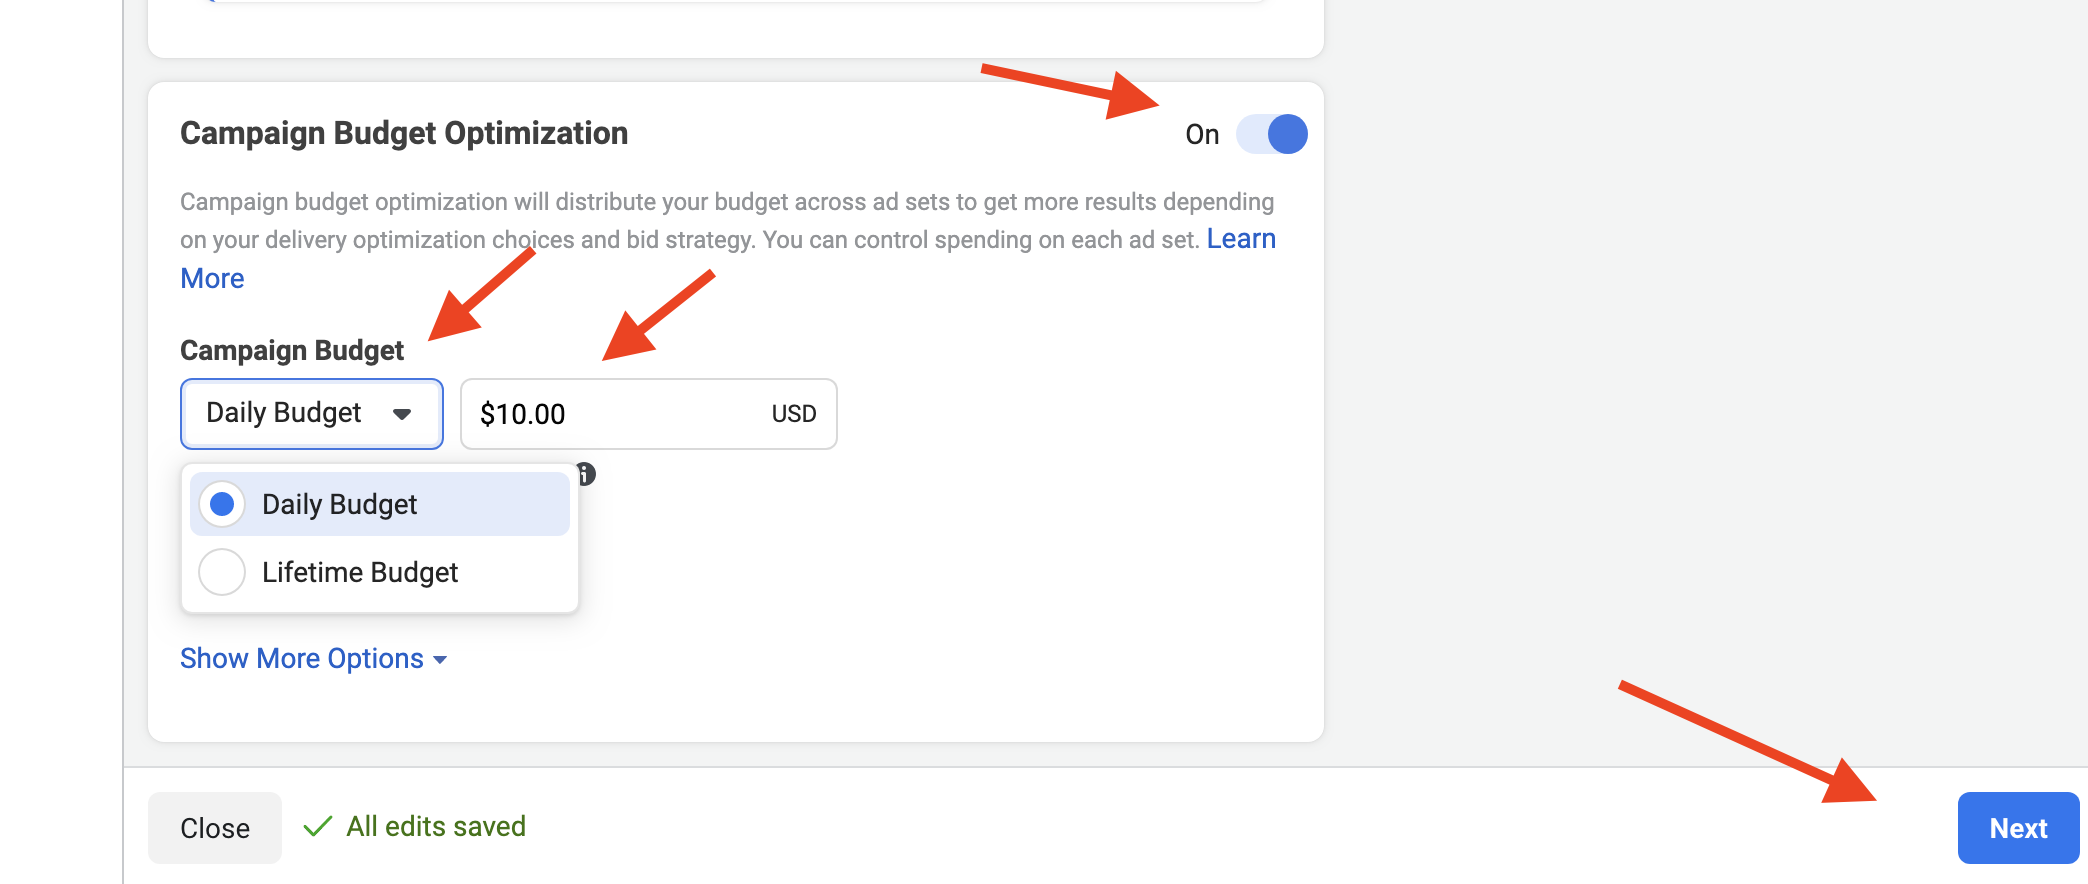
Once you have named your campaign head to the bottom of the screen and click ‘On‘ right next to ‘Campaign Budget Optimization‘. Then you will need to create a budget for the ad. We recommend selecting a ‘Daily Budget‘ and changing the value to $10. Once you have finished that click on the blue ‘Next‘ button.
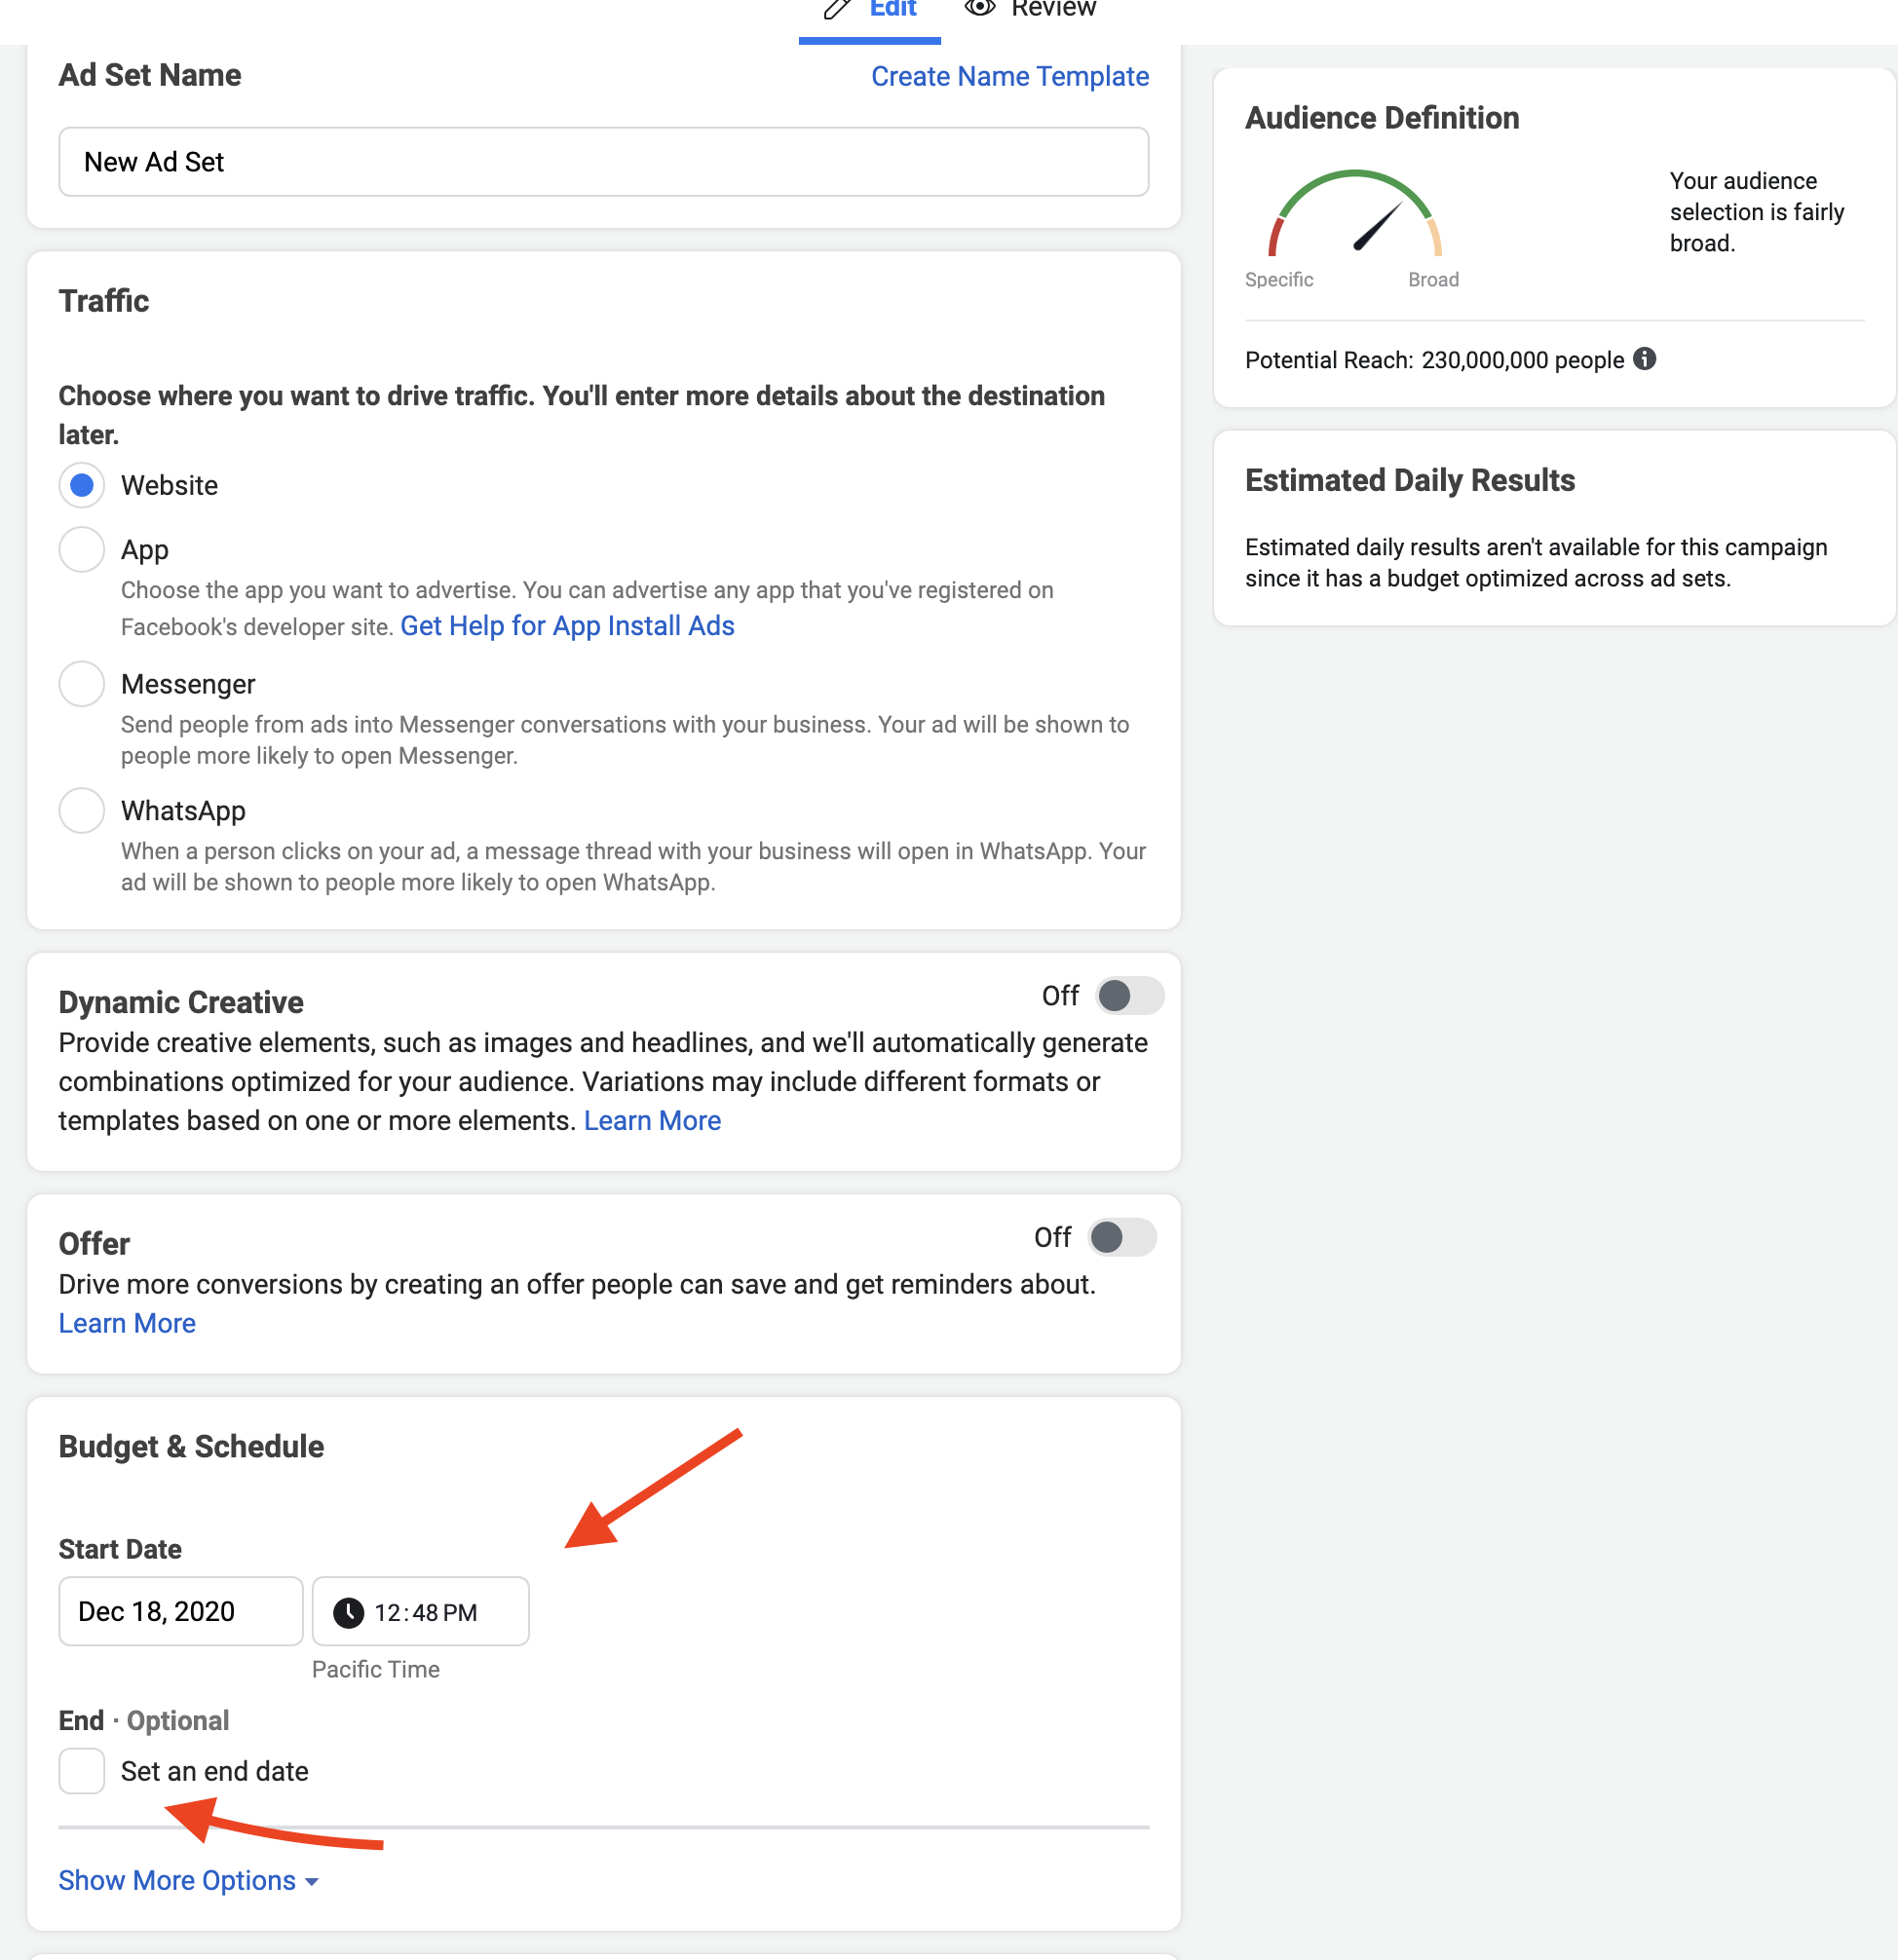
Most of the next page should already be filled out with recommendations by Facebook and you can leave those as they are. When we run ads, we do not select an end date for them because we like to monitor their performance each day. But if you would like to, you can click on ‘Set an end date‘ and then fill out that section. Just make sure not to forget about the ad, so that you stay within your desired budget.
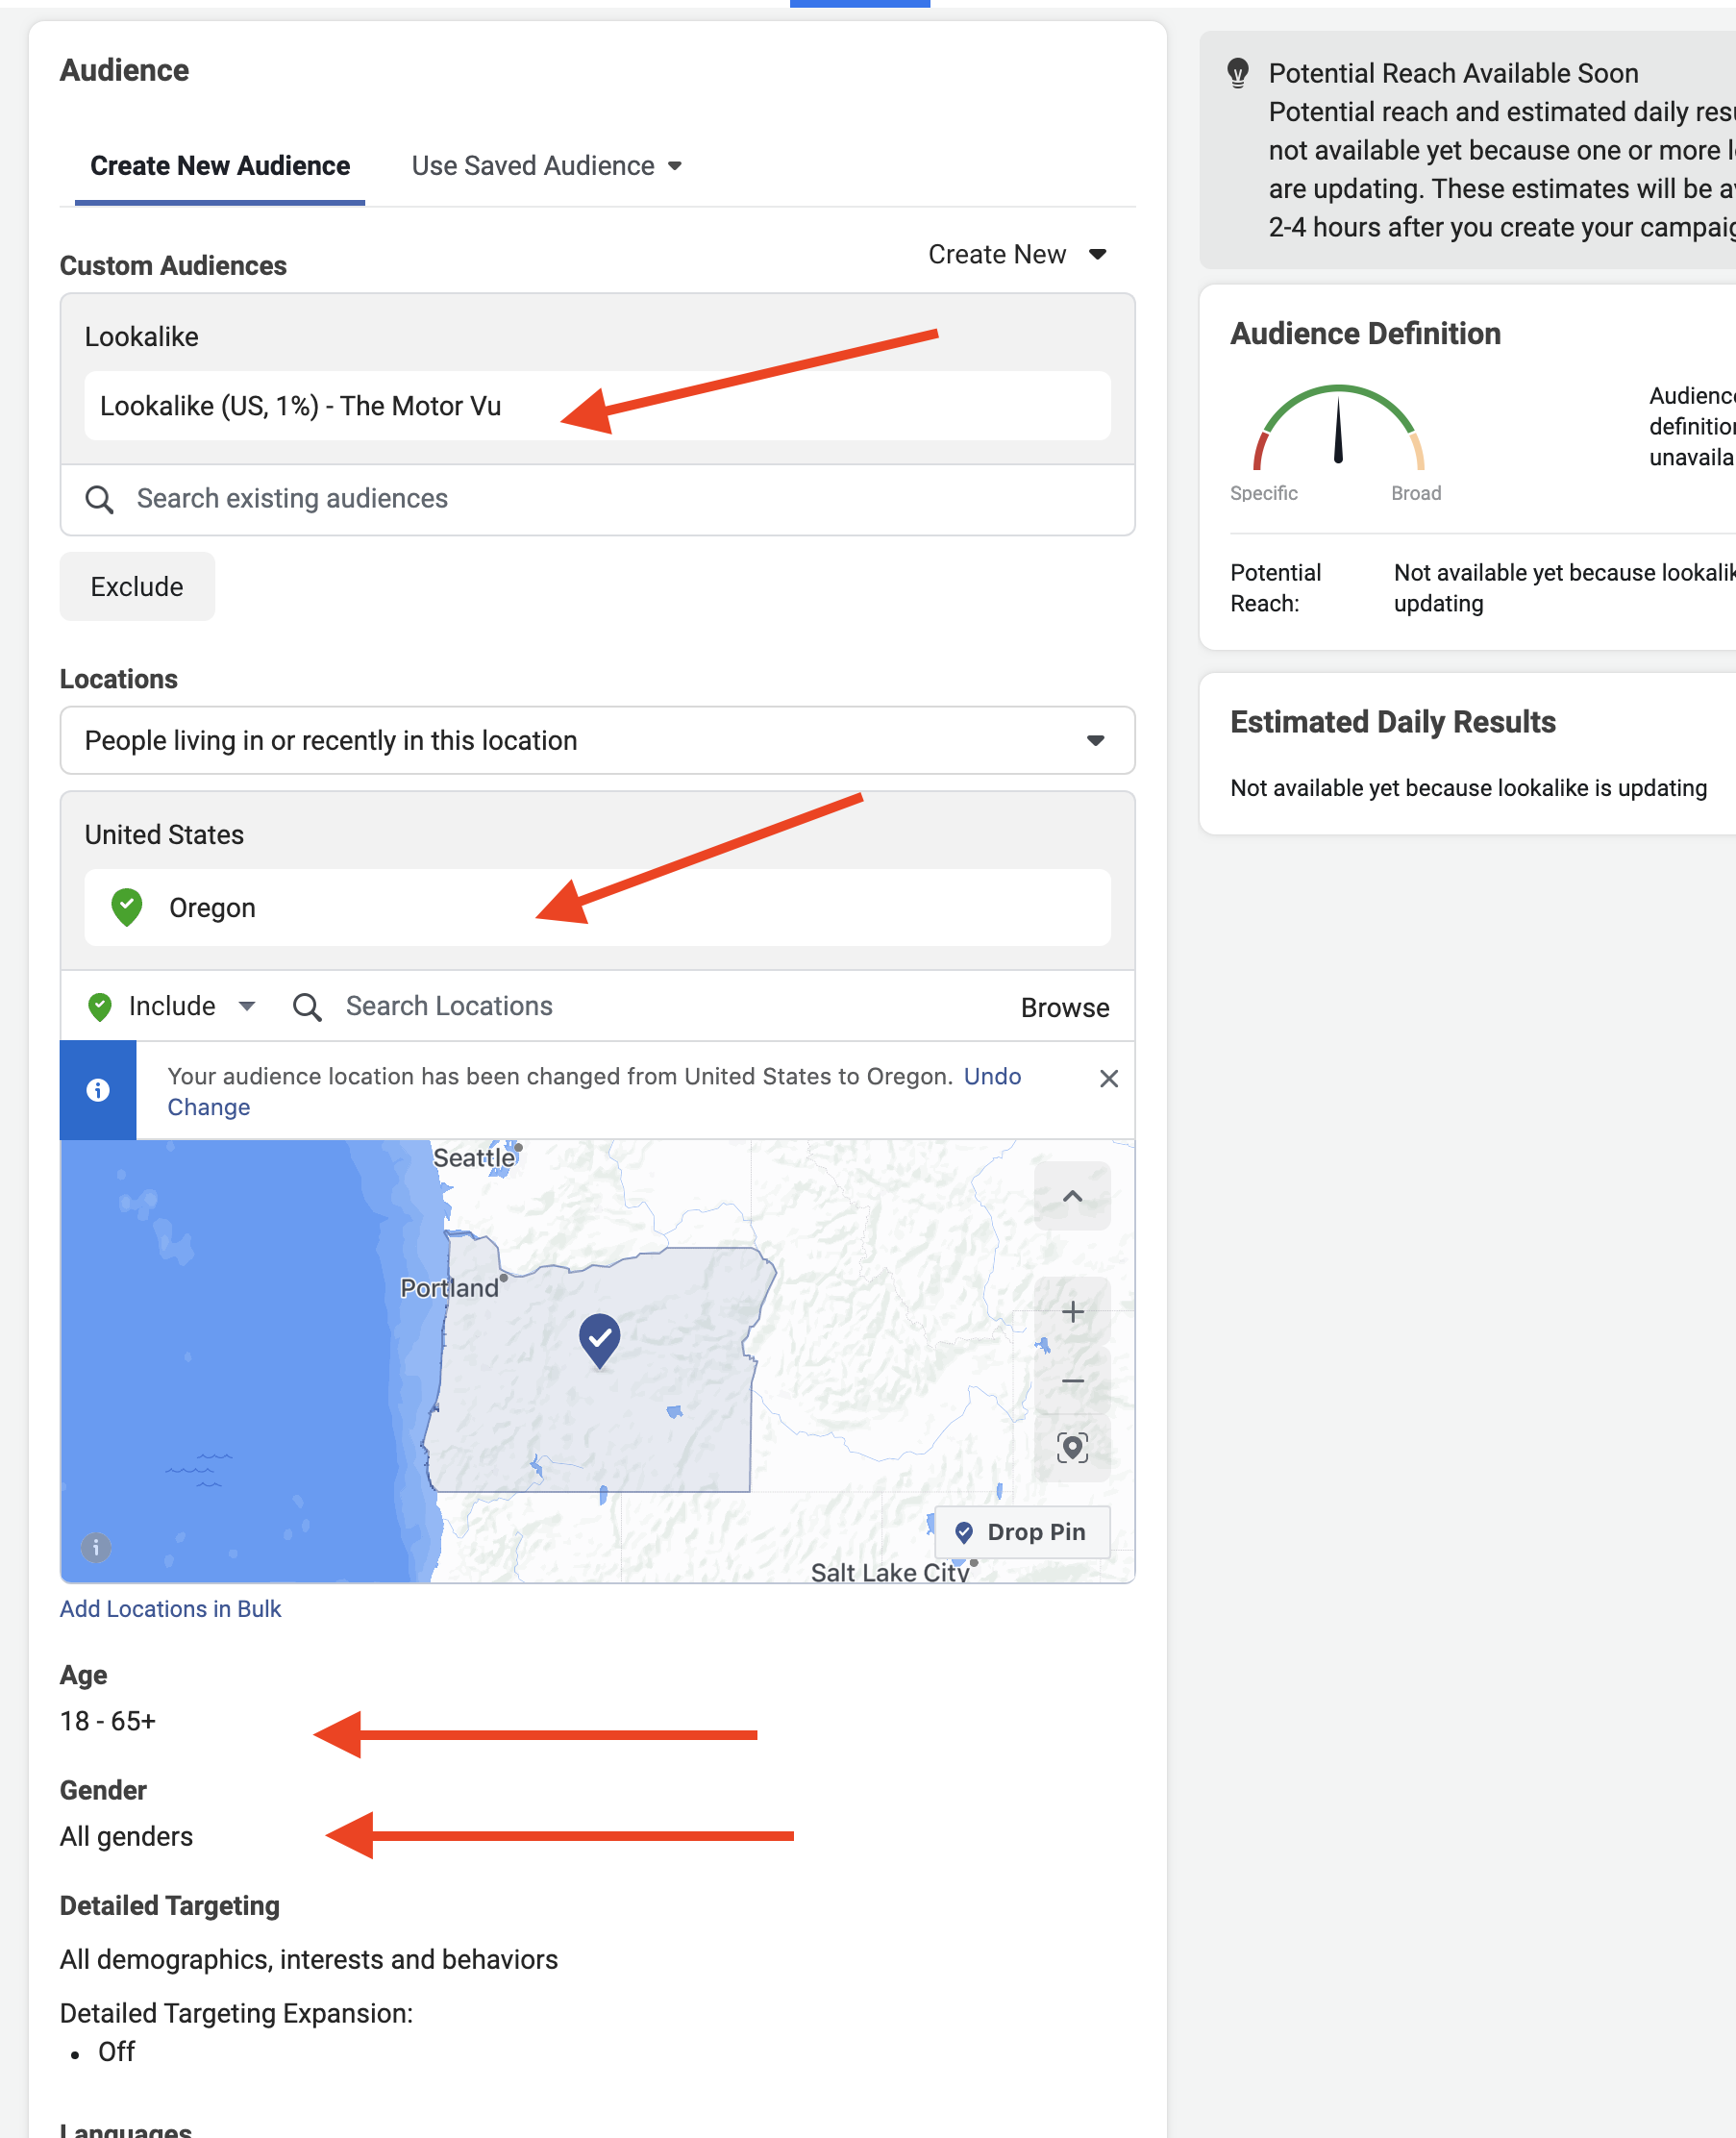
Then scroll down to ‘Audience‘ and make sure that the Lookalike audience that you uploaded to your Facebook account is selected. (If you have not yet uploaded your Facebook Audience you can read our article about how do so HERE). If you have a specific area that your event will be held, make sure that you select that location so that ad displays to customers located around there. Lastly, if you have a specific age group or gender you want to target, then make sure to narrow that audience down. In this example we left them as what Facebook suggested.
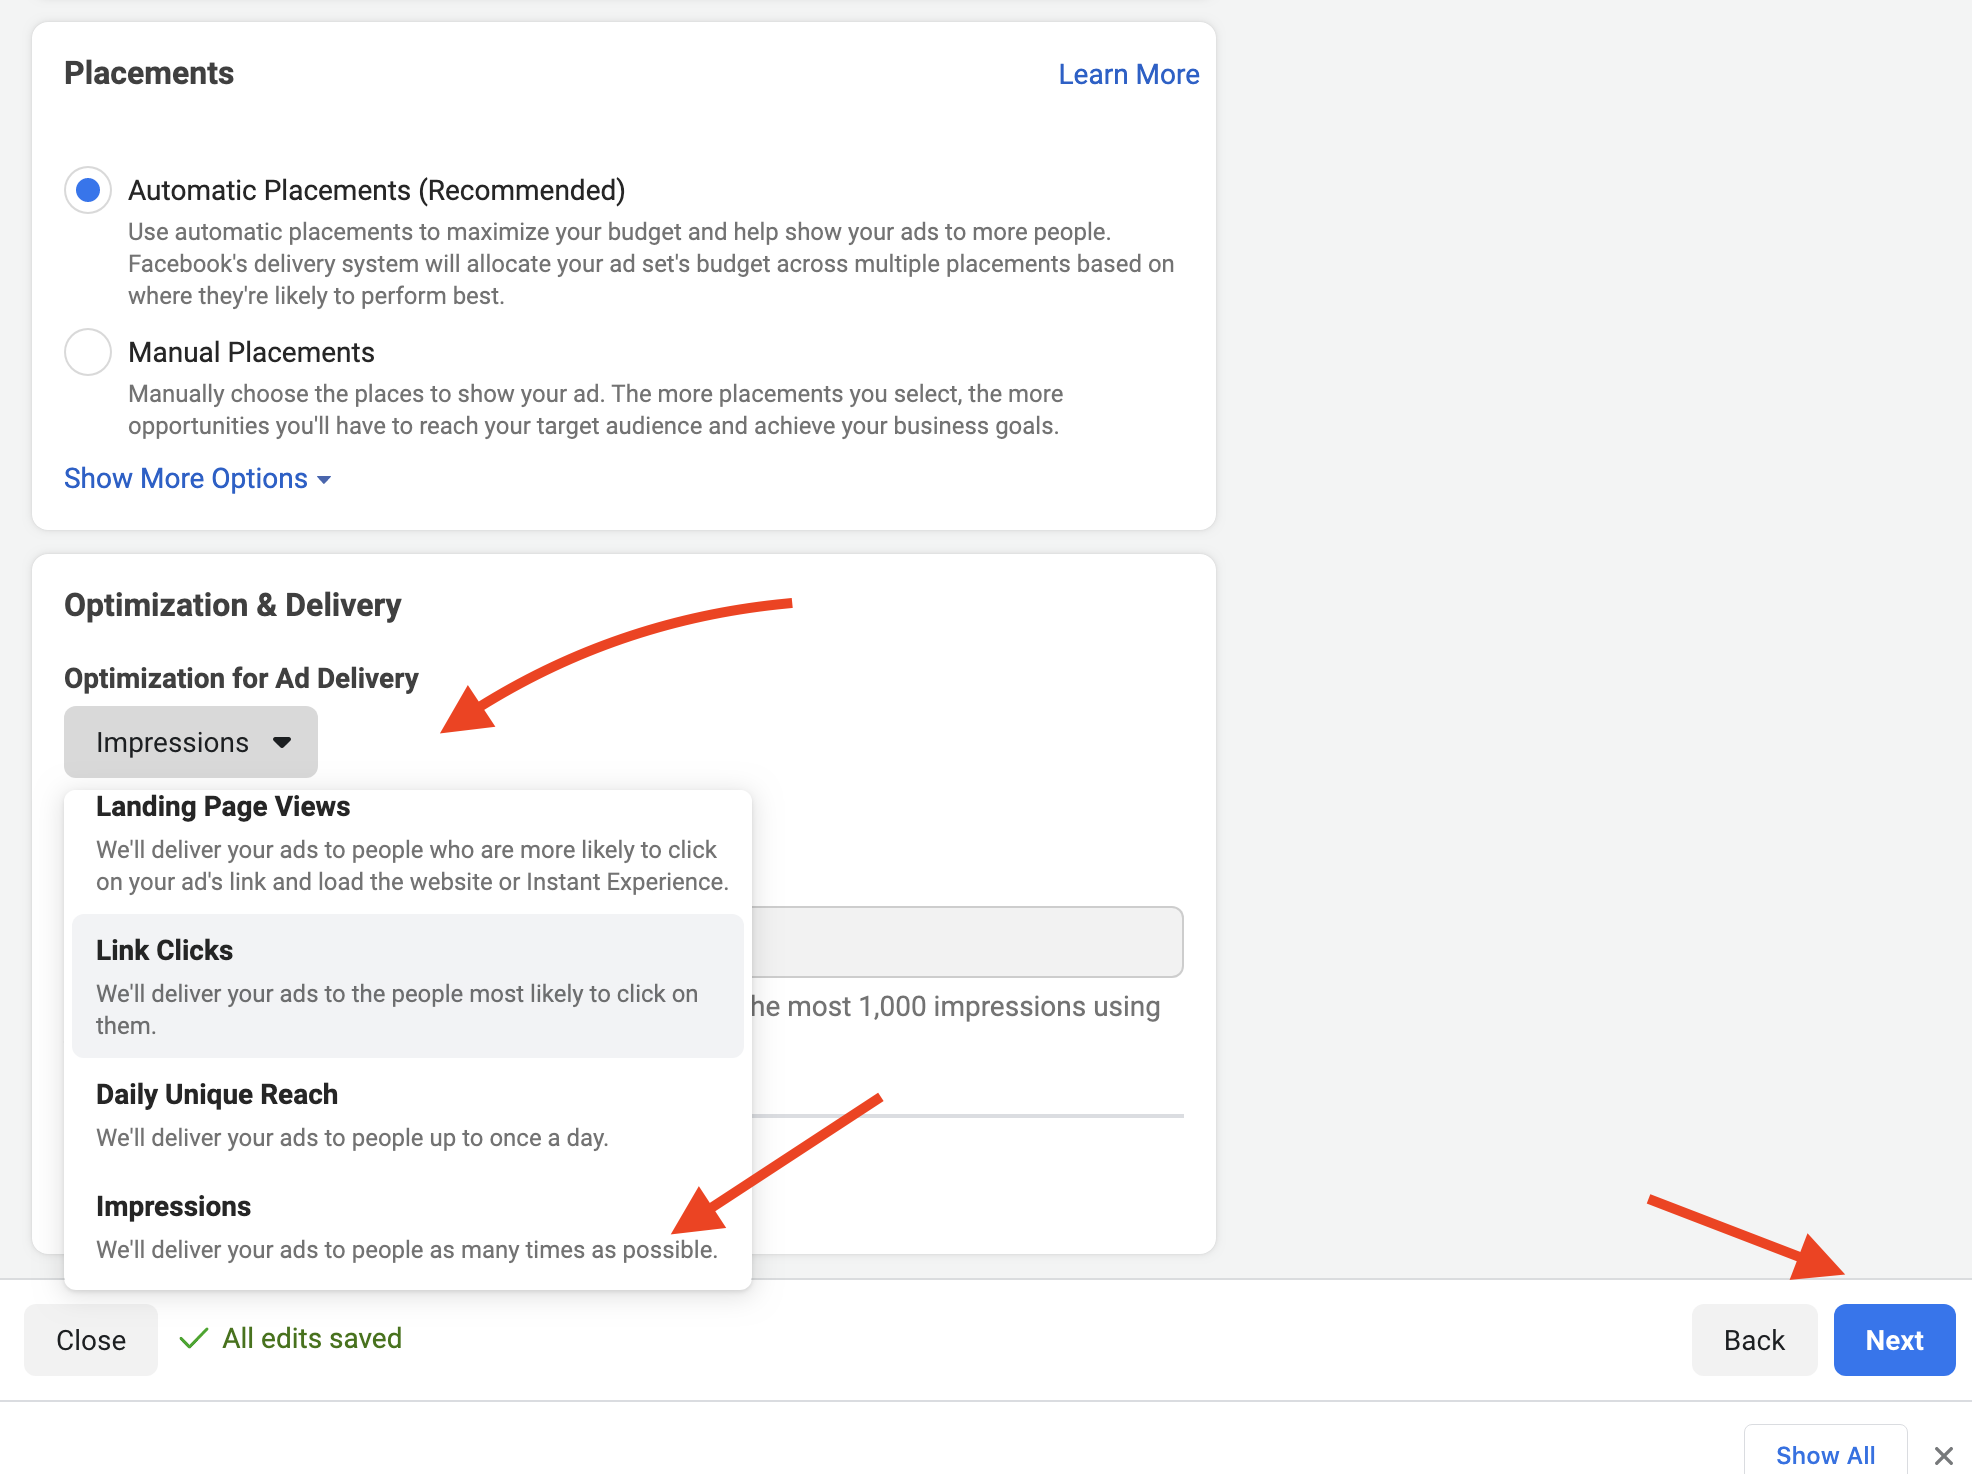
Then scroll down to the bottom of the page. This is where you will be able to edit the ‘Placements‘ for your ad. Unless you already know exactly where your customers are (Facebook, Instagram…etc) then I would leave this as automatic. If you do know that your customers are mainly on Facebook then you can click on ‘Manual Placements’ and turn off the Instagram options. But, we recommend leaving it as automatic if you have not ran an ad before. Then at the bottom of the page under ‘Optimization & Delivery‘ decide how you want FB to optimize your ad delivery. Your optimization choice will influence the people who see your ads. We recommend picking ‘Impressions’. Once you are finished then click on ‘Next‘.
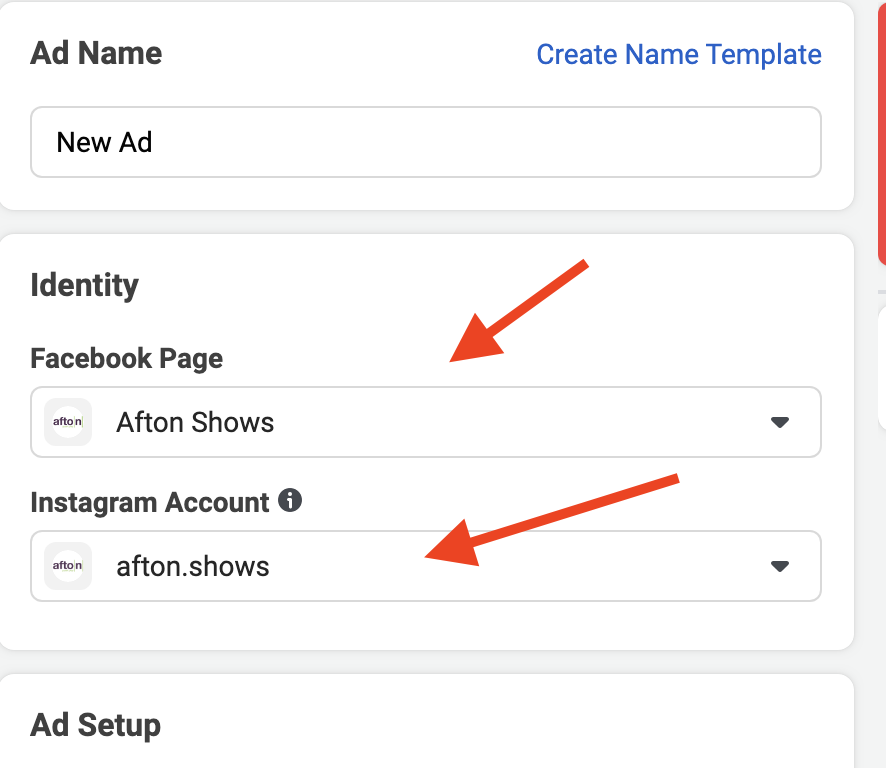
Next, on the top of the page you will need to make sure that both your Instagram account and your facebook pages are selected so that the ad knows which account image to display in the ad itself.
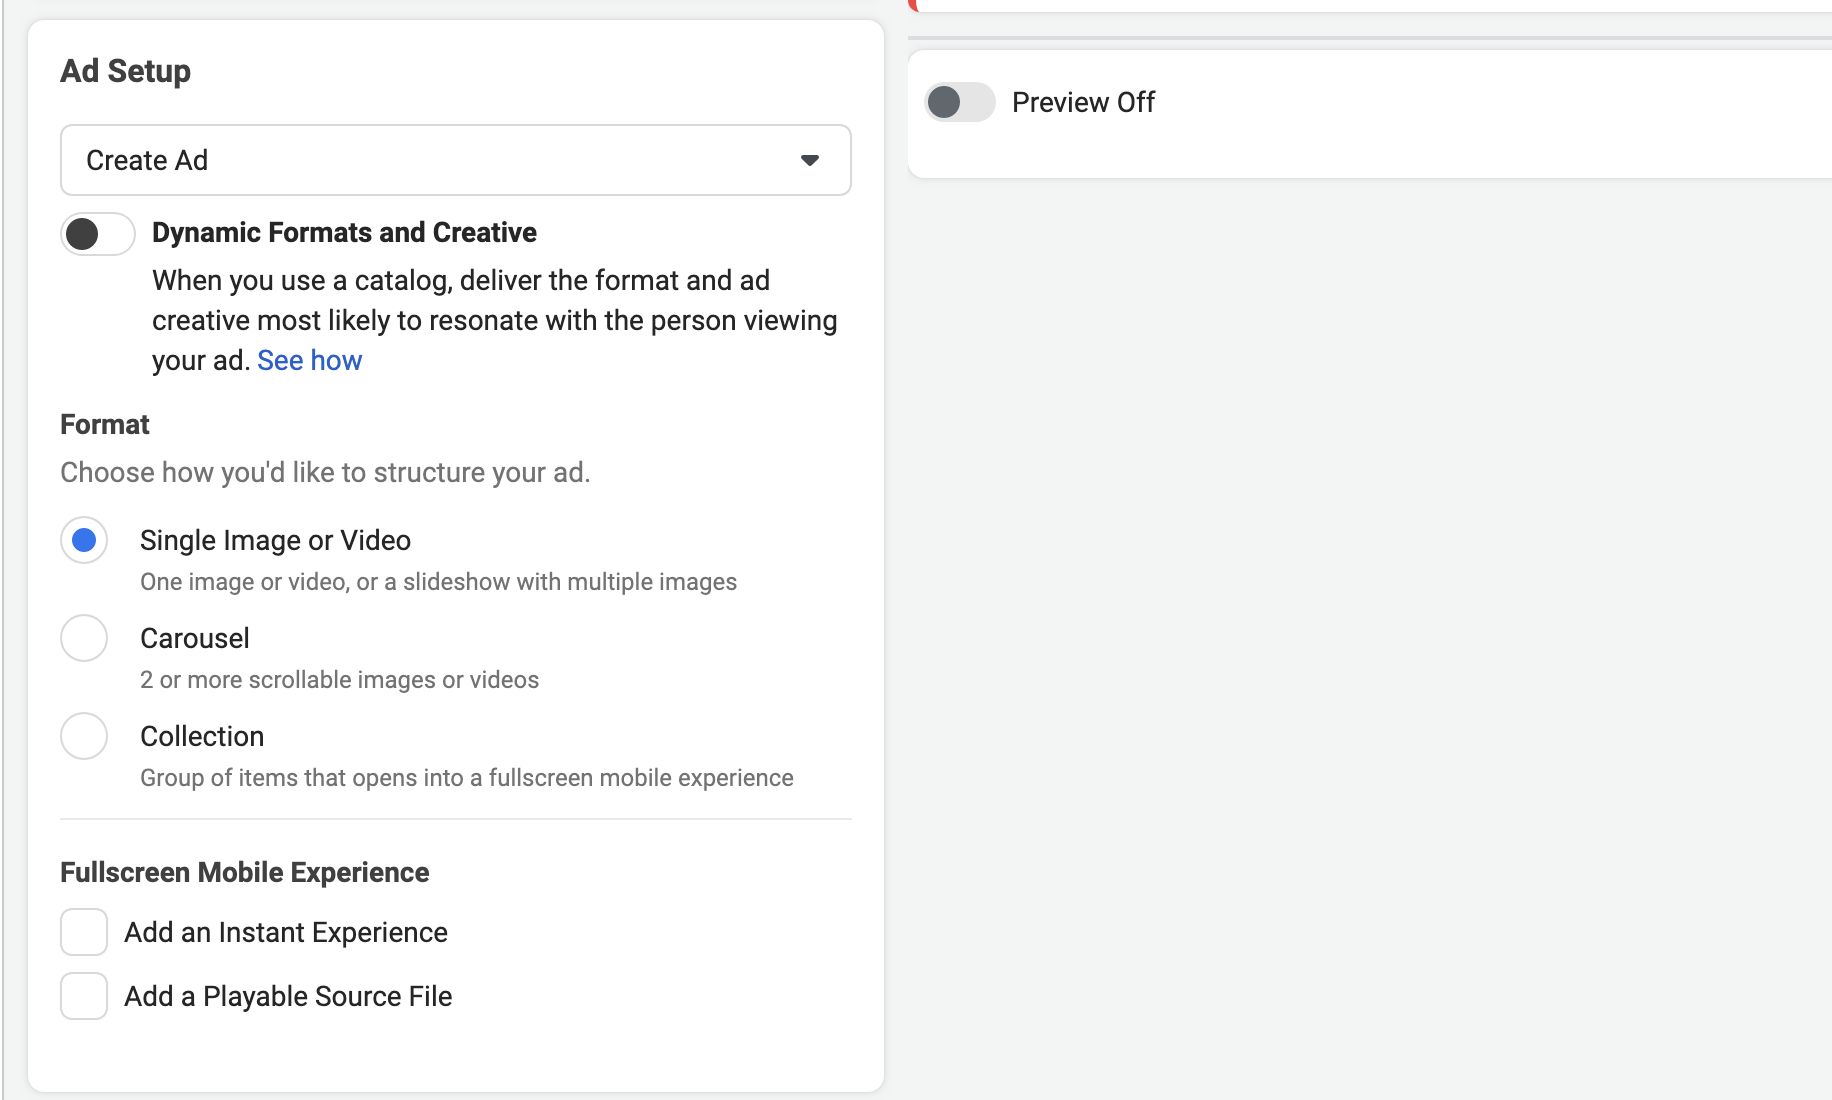
The next section you can skip over.
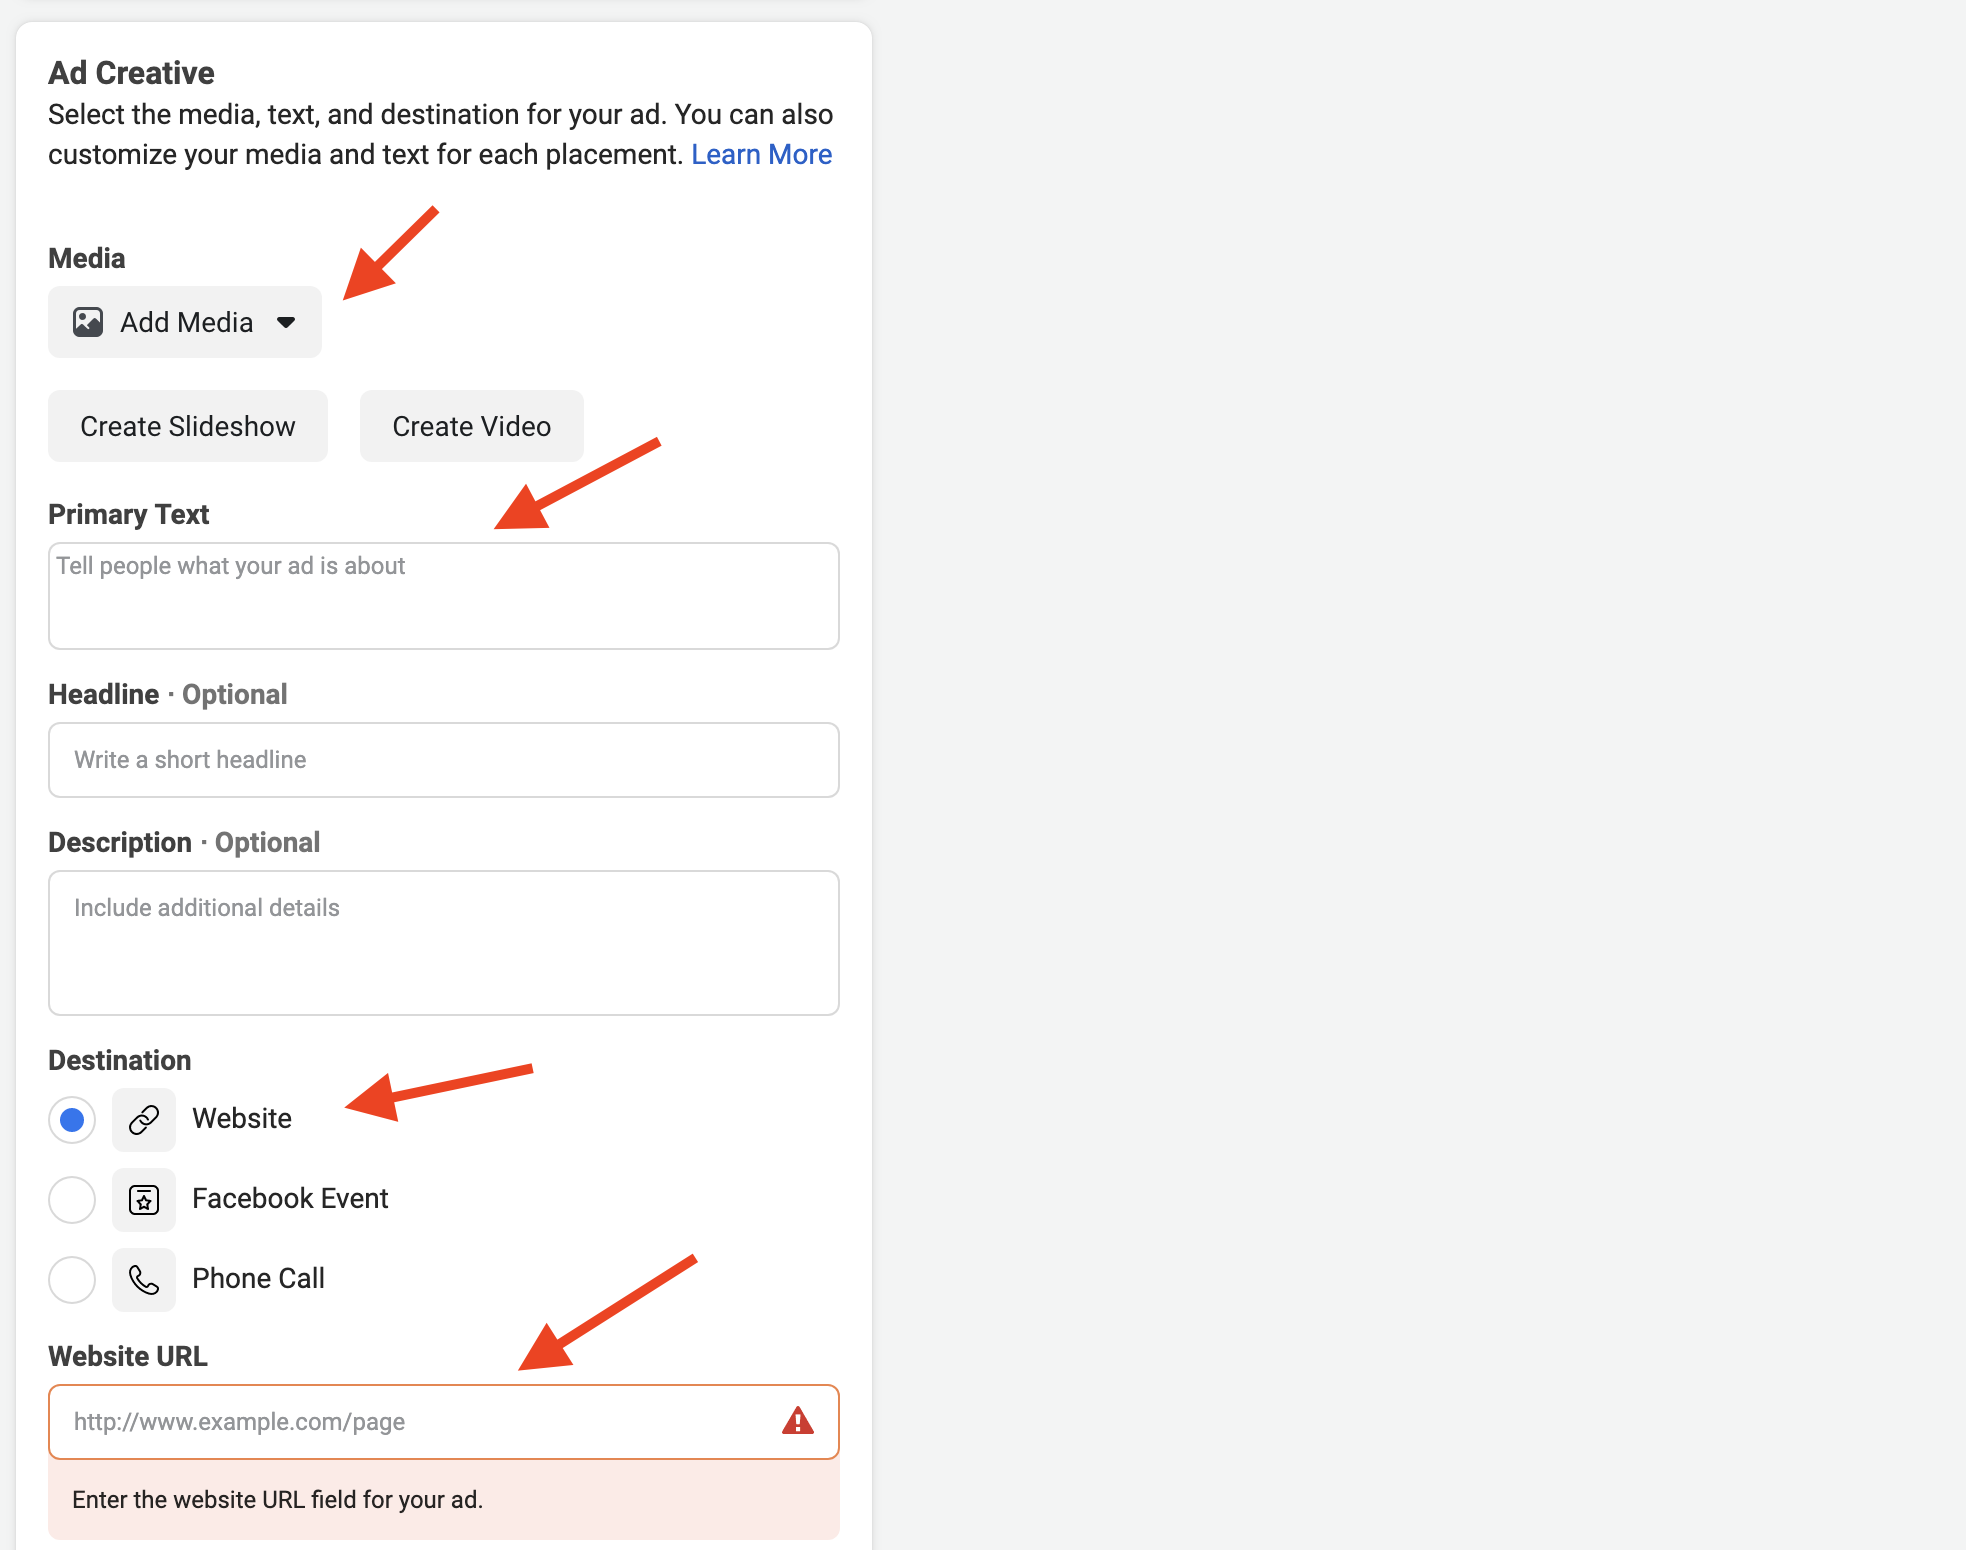
You should now be at the ‘Ad Creative‘ section. Starting off you will just click on ‘Add Media‘ to either add an image or a video for your ad (once you have it selected it will show a preview of the media on the right side of the page). Then you need to make sure that you fill out the ‘Primary text‘. Both the Headline and the Description sections are optional, but you can fill them out if you would like to. Next you should see that ‘Website‘ is already selected. Just leave that selected and then make sure to paste in the link that will take fans to your purchase page under the ‘Website URL’ button. NOTE: If you google “how to create a great Facebook ad” there are a ton of blogs/websites that go over ideas for compelling imagery and content.
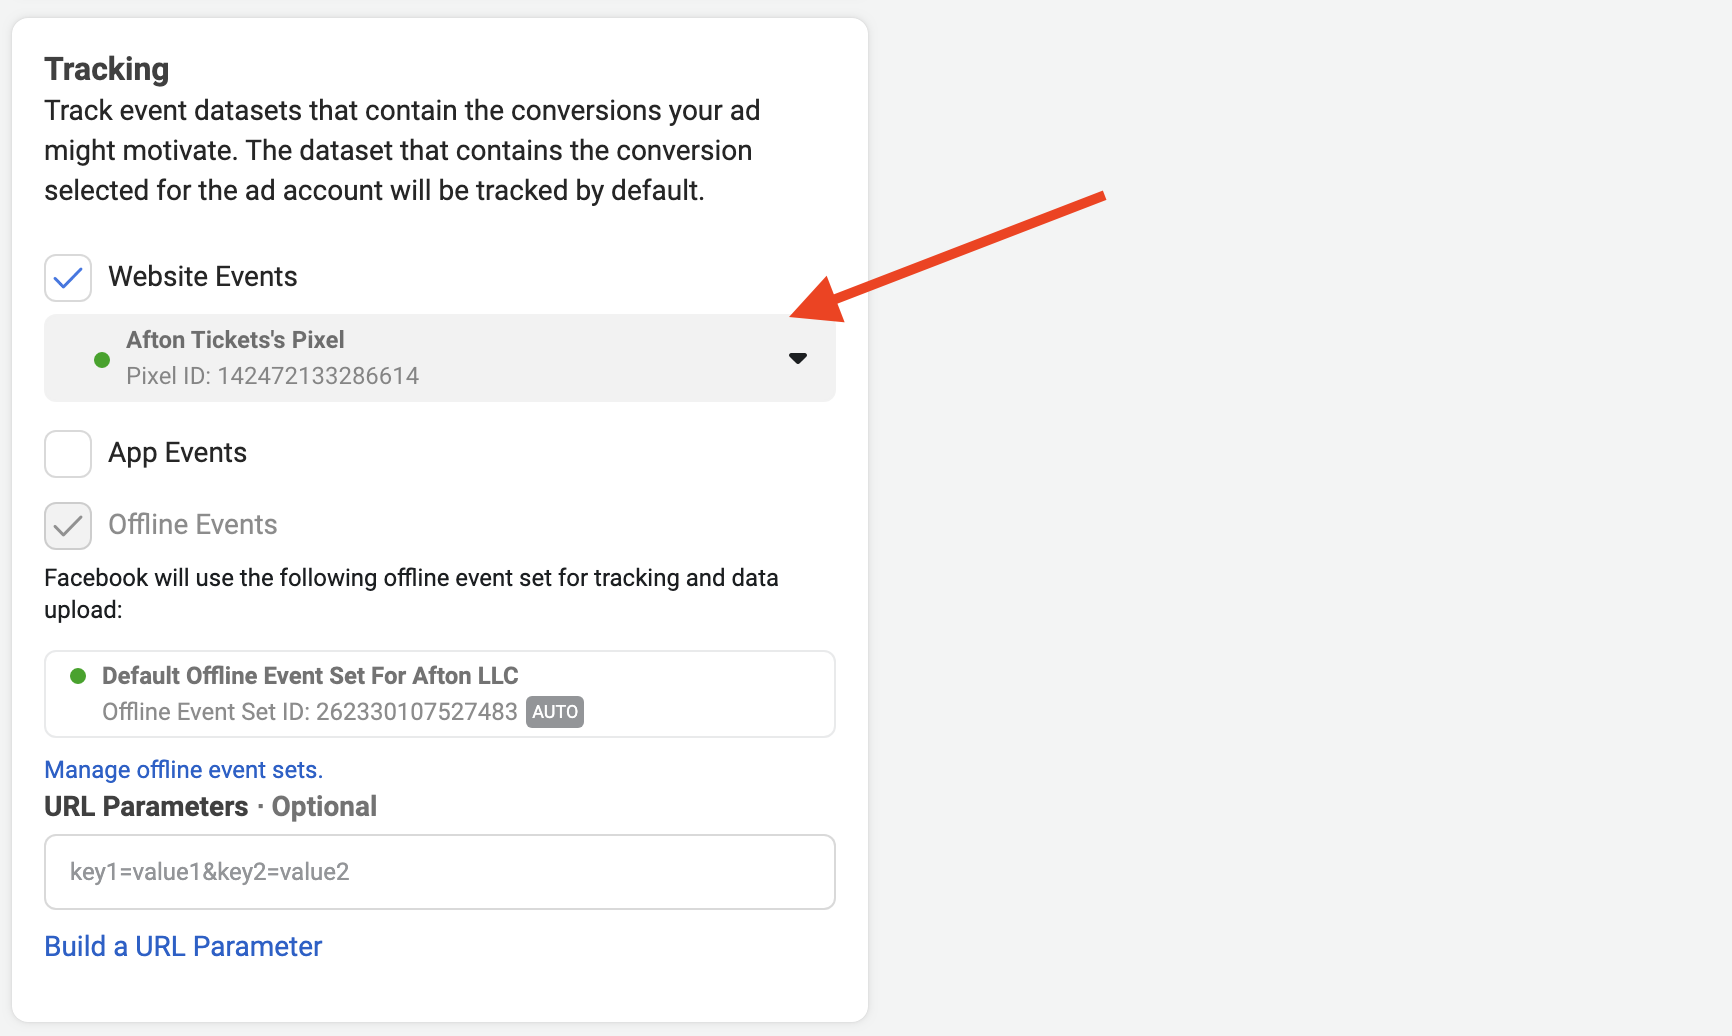
Then at the bottom of the page make sure that the Facebook pixel that you setup with your account is selected and has a green circle to the side of it. If you do not have your Facebook Pixel installed and entered into your Afton Tickets Account make sure to read over our help article that shows you how to do that. You can find it HERE.
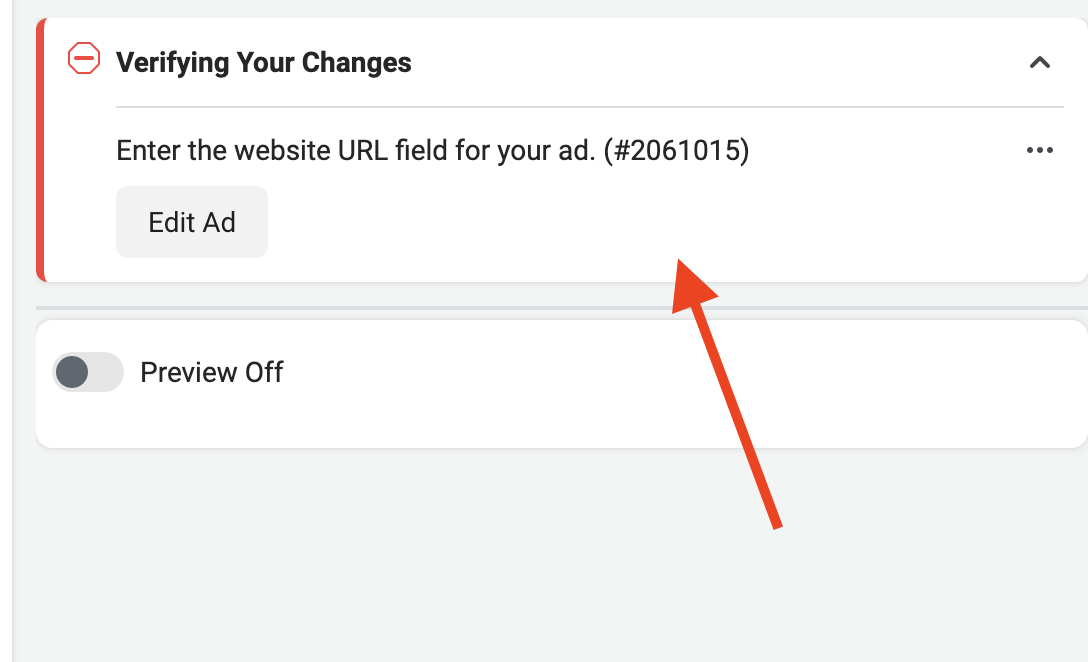
Now just look in the top right corner of the screen to make sure there are not any errors with your ad. As you can see in the image below it will not let you post the ad if you did not fill out a URL for the ad.
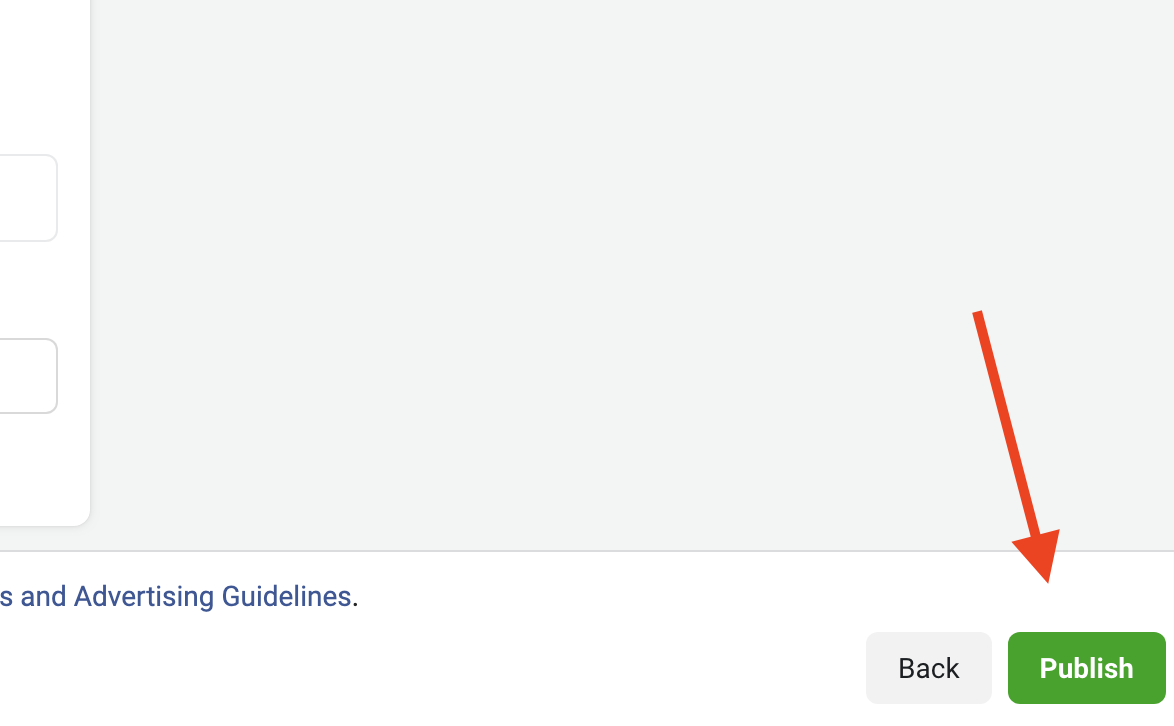
Once you have confirmed that there are no errors just click on the ‘Publish‘ button in the bottom right hand corner of the screen.
Once your ad gets approved by Facebook (typically most ads are reviewed within 24 hours) you will start to see the results of it in your ad account. If you would like help understanding your results, check out our help article that goes over that HERE.